Use this procedure to edit Line Item details after entering BOM Header information and Line Item Part Numbers and Quantities per assembly manually, using drag and drop, or copying.
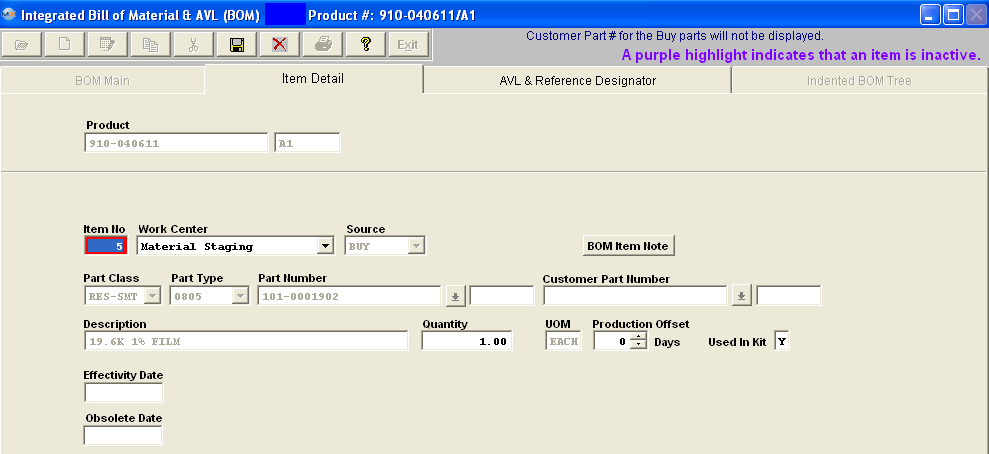
Click on the Item Detail tab. Depress the Edit button and enter password.
NOTE: If users choose to use effective and obsolete dates in place of proper revision control, you must be absolutely certain that they do not take effect at any point after production begins and before the WO is closed. If this isn't properly managed, you will get the variances. While some may be minor and positive variances may partially offset negative variances, you CANNOT rely on this and you WILL have discrepancies.
The best approach is to always roll the revision when there is a change to an assembly that will affect the value in any way. This becomes even more important if you have WOs open long after the due date and it has had additional changes to the configuration. See Article #5055 for further detail.
The Item number, Work Center, Qty, Production Offset, Used in Kit, Effective Date, and Obsolete Date can be edited on this screen.
The Production Offset would be edited, If an item is to be kitted to a Work Center that will not be reached by the Work Order until X days later, enter X days in the Production Offset to allow kitting to that Center X days later. NOTE: This will affect the MRP demands until the kit status has been changed to "KIT IN PROCESS". Once the kit status has been changed to "Kit in Process" the parts now become a kit shortage, and the system will calculate from the WO due date or production lead time and NOT from the production offset.
Enter Effectivity Date for the line item to be used in the BOM.
(Note: Prior to Effectivity Date or after Obsolete Date, the line item will not appear on the Current BOM view nor will it appear on a Pick List to Kit the Assembly.)
Edit the "Used in Kit" by selecting Y (Yes) for Used in Kit unless the item is not to be issued when a kit is pulled. Select P (Phantom) to cause a Make subassembly to be treated as a Phantom when kitted. Select N (No) if the item is provided to the Line by some other means than kitting. (Note: Chemicals and adhesives are typical not-kitted items that are referenced on the BOM for costing or specification but issued to the production floor on a bulk replenishment basis.)
If you depress the AVL & Reference Designator tab the Ref designators can be edited manually in the table OR Enter the Prefix letter, Start No and End No and click on the Calculate button to auto-number. Here is where you will also check the approved AVL's and uncheck the AVL's that are NOT approved for this BOM. NOTE: If "GENR" is approved on the BOM MRP will consider any inventory for that part even if the AVL is NOT approved on the BOM. When adding new AVL's to the item master, if you do not want the BOM's automatically updated be sure that the "Disable Automatic BOM AVL update" is Enabled. See article #1477 for more information.
You may also Add or Delete Alternate Parts by depressing the Add or Delete button near the Alternate Parts to select alternative part numbers for the Line Item currently being edited in the BOM. This table is in the BOM screen because alternate part usage is always dependent upon the application and hence is BOM specific. (Note: Use the Quantity Info screen and AVL window to show alternate manufacturers; the alternate part window is only for items with a different internal part number (such as faster or tighter tolerance parts) that can be used on a temporary deviation when there is no choice.)
Once you have completed the changes, depress the Save button and BOM will be updated.
Note: If the Leveling of Make items is in process then the users will not be able to Add/Edit a BOM, even if the user is already in modifucation mode of the BOM, the user will not be allowed to save the changes until the leveling process is complete. This is due to the fact that the affected records in leveling of Make Parts is large and complex, the saving time to commit the whole changes to inventory tables does take a large amount of time, so we do not want users making modifications to the BOM when the process is still leveling, so we have added a flag that the users will see within the BOM module.
|