|
Before you start, please make sure you have a recent backup for any case of data loss. If you are not used in computer administration and database administration please contact an professional.
Please make sure all across services are stopped and the server application crossAdmin is closed. In case of Personal Edition simply close across.
Please go to Start >> Programs >> SQL Server 2005 >> SQL Server Management Studio (Express) and open the application.
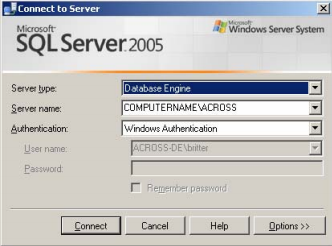
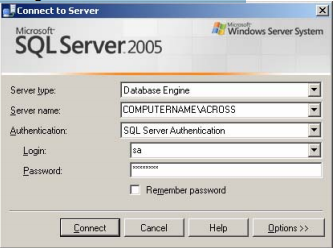
1. When the application opens you have to connect to the database engine or SQL Server. Please enter the correct SQL Server name and the possible instance name as shown below. Please note, in case of Personal Editon your databases are always
created in an instance which is named "across". The SQL Server name is your Computer name.
a) Connect with Windows Authentication
(You have Windows administration rights)
b) Connect with SQL Server Authentication
(You have no Windows administration rights, but you know the password for the SQL Server administrat "sa". In case of Personal Edition this password is set automatically during installation. It is "sa123456"
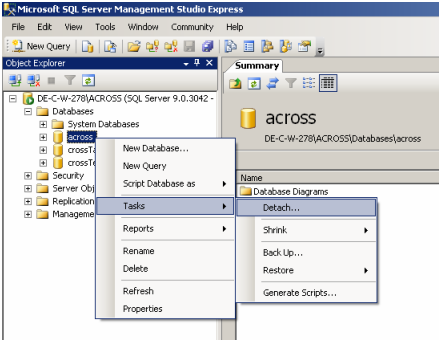
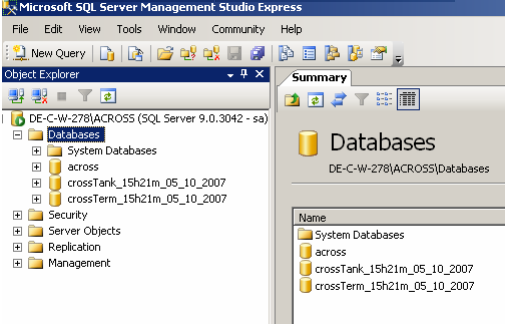
2. After successful connection expand the folder Databases in the object explorer, right-click the database you want to detach and select Tasks>>Detach as shown in screenshot below.
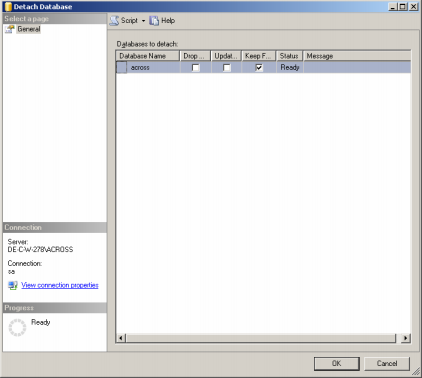
A new window will open. Simply leave it as is and click OK to detach the database
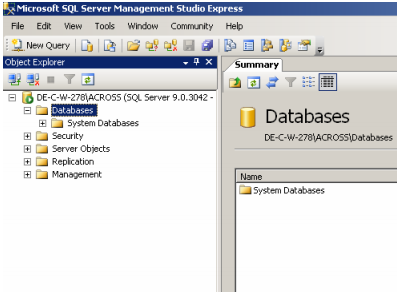
After successful detachment the window automatically closes and the database is not listed at the Object explorer anymore.
If you want to move all across databases please detach also cTank and cTerm databases.
After detachment of all databases there is no database listed anymore and looks like as shown in screenshot below.
3. Now please find the detached databases and database log files by default under C:/Program Files/Microsoft SQL Server/MSSQL.1/MSSQL/Data and move the files to the new destination. If you have detached all 3 databases you have to move 6 files
(3 databases and 3 database log files).
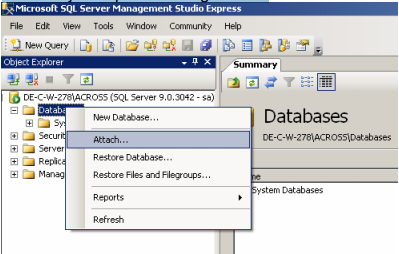
4. After you have moved the databases go back to the SQL Server Management Studio object explorer and right-click the folder databases. Select Attach.
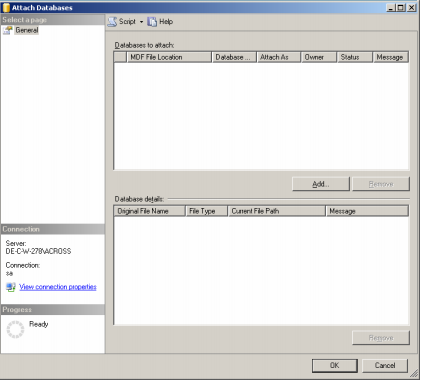
A new window opens where you simply have to press 'Add'
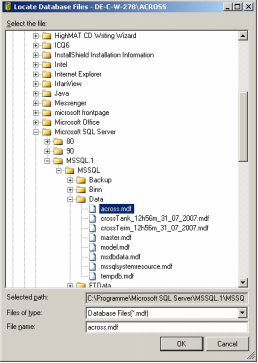
Again a new window opens where you have to browse for your database. You have to add your databases (only the databases) step by step
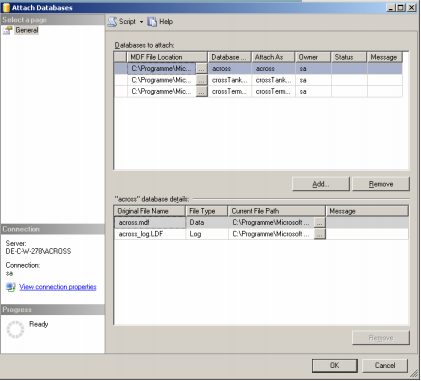
When you have added your database the window should look like the screenshot shown below. Please check the file location and file names if they are correct and finally click 'OK' to attach these databases.
Finally it looks like the beginning as shown in screenshot below.
Now please reopen the server application crossAdmin and start all across services again. In case of Personal Edition simply open across.
|