To obtain the MRP Reports within the Web, select the WEB Print button from the ManEx action buttons at the top of the screen. For further detail on How the Reports work within the Web refer to Article #5477.
Note: In order to access the Reports within the Web the Company Root URL must be setup within the System Appearance module and user must be linked to web within the System Security Module
Select the Report Type: MRP - A List of Reports will be displayed that are available on the Web
for MRP

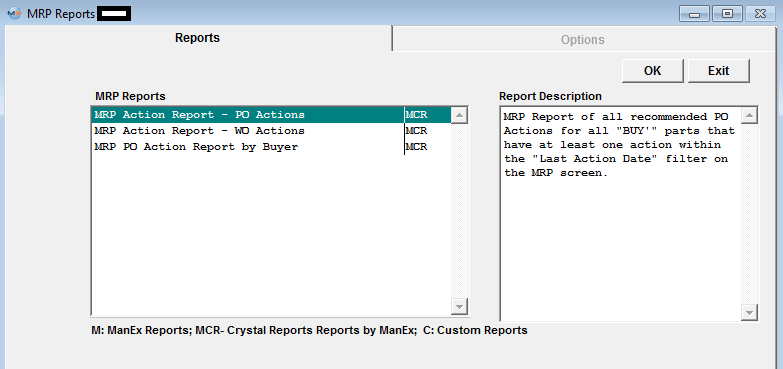
To obtain the MRP Reports within the desktop, select the Print button from the ManEx action buttons at the top of the screen.
The following reports screen
will display a list of reports that are available on the ManEx Desktop:
Highlight the report, depress the option tab (if applicable) and depress the OK button.
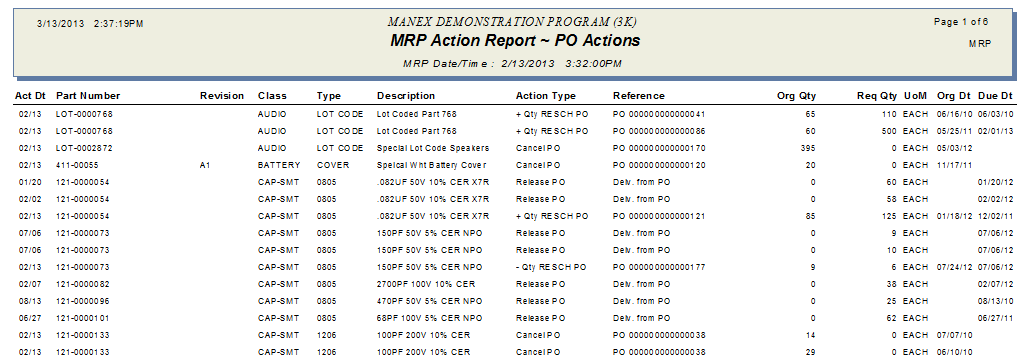
MRP Action Report - PO Actions - MRP Report of all recommended PO Actions for all "BUY'" parts that have at least one action within the "Last Action Date" filter on the MRP screen.
The following report is printed:
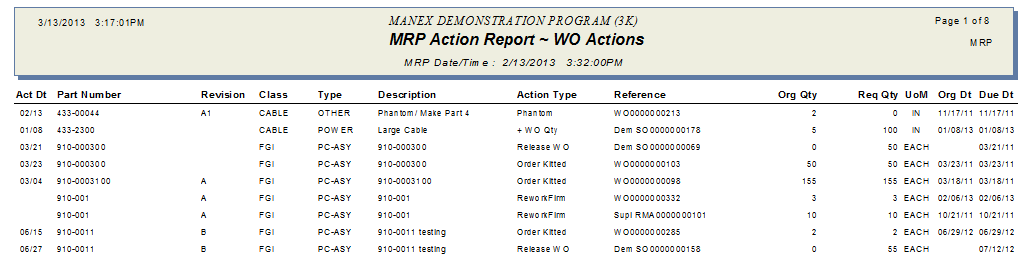
MRP Action Report - WO Actions - MRP Report of all recommended PO Actions for all "BUY'" parts that have at least one action within the "Last Action Date" filter on the MRP screen.
The following report is printed:
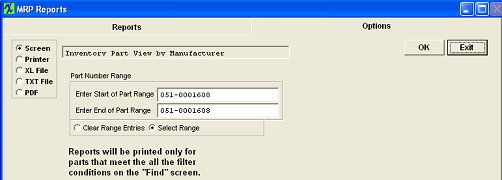
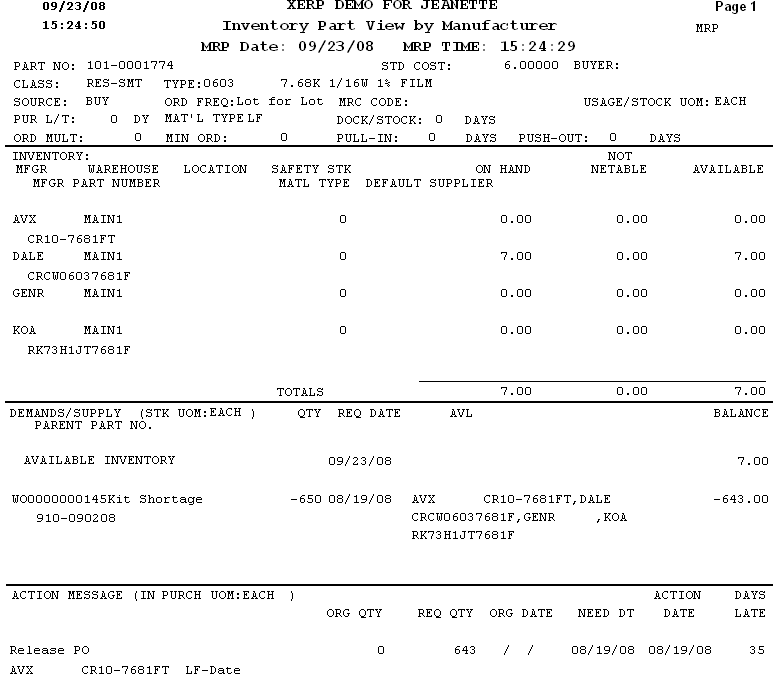
Inventory Part View by Manufacturer - This report displays the inventory information, supply, demands and action messages for a part that are the results of the latest MRP run.
|
For Inventory Part View By Manufacturer, depress the Options tab:
Select the Part Number Range desired. To clear the range entries, click on the "Clear Range Entries" radio.
Depress the OK button.
This report is divided into three sections: Inventory; Demands/Supply; and Actions
|
 |
The following report is printed:
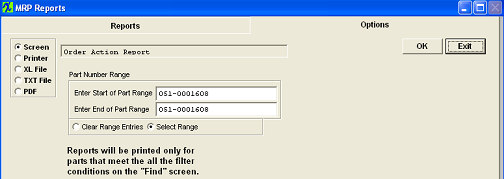
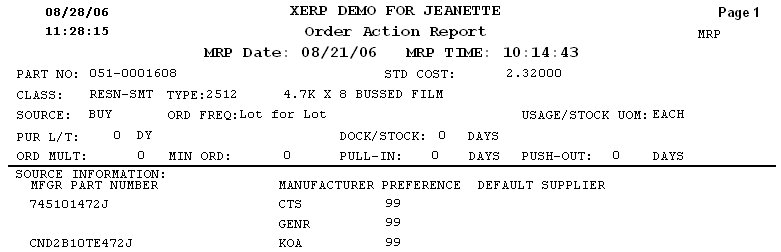
Order Action Report - This report displays the inventory information, purchase history, open PO's and MRP actions for 'BUY' parts that are the results of the latest MRP run.
|
Depress the Options tab.
Select the Part Number Range desired. To clear the range entries, click on the "Clear Range Entreis" radio.
Depress the OK button.
NOTE: The MFGR and MFGR part number will only be printed in the Order Action Message Section if the order policy for the part is LOT for LOT.
|
 |
The following report is printed:
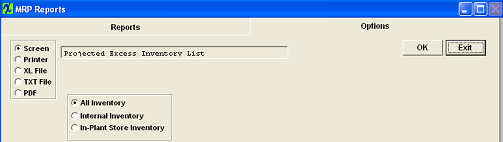
Projected Excess Inventory List - This report list the projected excess inventory that is on hand but not needed after MRP requirements.
|
Depress the Options tab.
Select the radio for "All Inventory", "Internal Inventory" or "In-Plant Store Inventory".
Depress the OK button.
Note: The Projected Excess Inventory report runs off of the entire MRP run, not just based off of the MRP find filter that might be applied.
|
 |
The following report will print:

MRP Horizontal Planning Summary - This reports displays the supply and demand for each part on the MRP action list with the quantities in weekly buckets.
Note:This report requires Legal size paper.
The following message will appear:
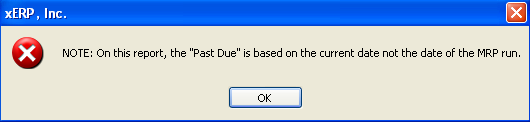
Depress the OK button and the following report will be printed:

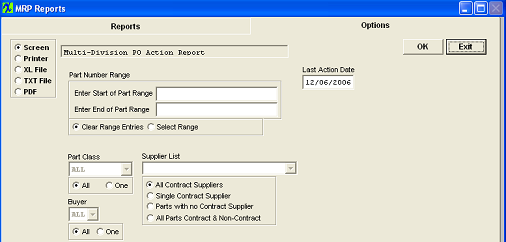
Multi Division Purchase Order Action Report - NOTE: The system does NOT require that you have Multi-Divisions setup to utilize this report.
|
Depress the Options tab.
Select the Part Number Range desired, then enter the Last Action Date.
To clear the range entries, click on the "Clear Range Entries" radio.
Select the Part Class from the pull down. Select the Supplier List from the pull down.
Select the radio to list the Report by: "All Contact Suppliers", "Single Contract Supplier", "Parts with no Contract Supplier", "All Parts Contract & Non-Contract".
Select Buyer from the pull down.
Depress the OK button.
|
 |
The following report will be printed: The report is intended to break down the PO actions from the MRP run by Buyer, then part number.
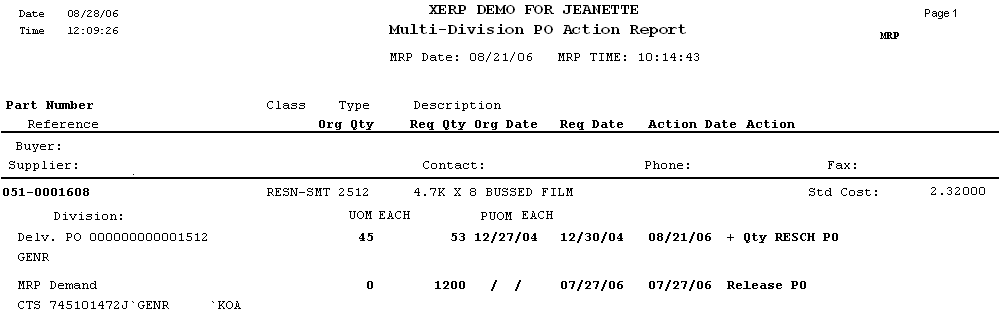
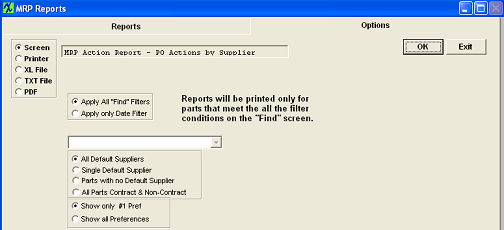
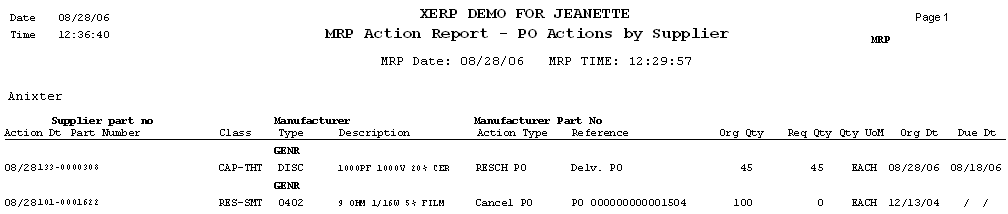
MRP Action Report - PO Actions by Supplier - MRP Report of all recommended PO Actions for all "BUY'" parts that have at least one action within the "Last Action Date" filter on the MRP screen by Supplier
|
Depress the Options tab.
Select Apply All "Find" Filters or Apply only Date Filter by clicking on the radio.
Select the Supplier from the pull down.
Select the radio butto to list the report by: "All Default Suppliers", "Single Default Supplier", "Parts with no Default Supplier", "All Parts Contract & Non-Contract".
Select to Show only #1 pref or Show all Preferences by clicking on the radio.
Depress the OK button.
|
 |
The following report will print:
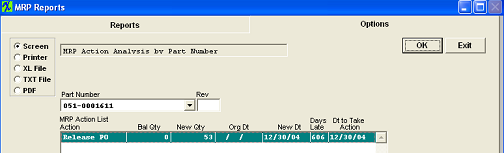
MRP Action Analysis by Part Number
|
Depress the Options tab.
Depress the down arrow next to the Part Number box.
Use the slider to reach the Part Number of interest.
Highlight it and click. The Actions will be displayed.
Depress the Ok button.
|
 |
The following report is available:

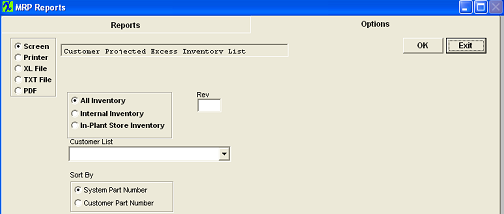
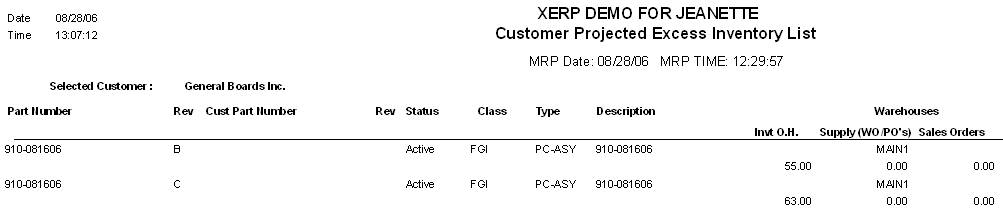
Customer Projected Excess - This report list the projected excess inventory that is on hand but not needed after MRP requirements for a selected customer.
Note: This report requires Legal size paper.
|
Depress the Options tab.
Select All Inventory, Internal Inventory or In-Plant Store Inventory by clicking on the radio.
Select a Customer fron the pull down.
Select to Sort by System Part Number or Customer Part Number by clicking on the radio.
Depress the Ok button.
Note: The BOM MUST be associated to a Customer for the report to work. If you select a customer, the program will find all the assembly’s and sub assembly’s assigned to that customer find all the parts on those BOMs. Then it will exclude the parts that are used on the BOM of a different customers.
|
 |
The following report will be printed:
MRP PO Action Report by Buyer - MRP Report of all recommended PO Actions for all "BUY'" parts that have at least one action within the "Last Action Date" filter on the MRP screen.
Note: A default Supplier MUST be linked to the inventory part before it will display on the report.
The following report will print:

|