|
|
Enter the SQLMANEX.EXE (within the ManEx root directory)
This action will then prompt the user for a password
|
 |
|
The following screen will be displayed, select Material Planning/Purchase Setup/Supplier Contract Management
|
 |
The following screen will be displayed:
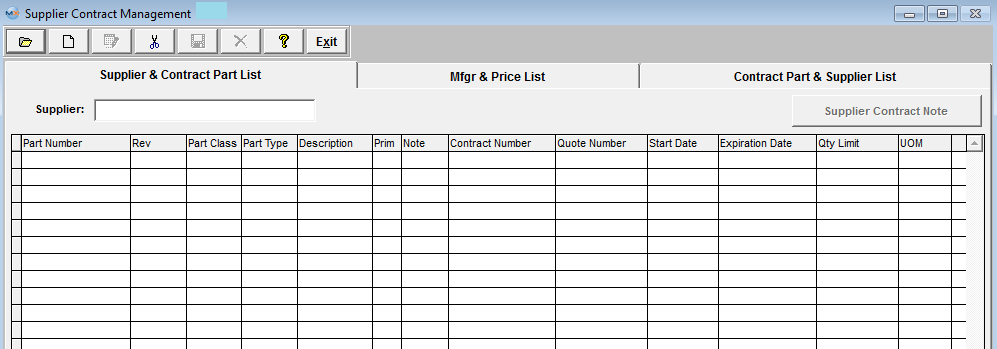
To add a new In-Store Supplier Contract, depress the Add action button while in the Supplier & Part List tab.
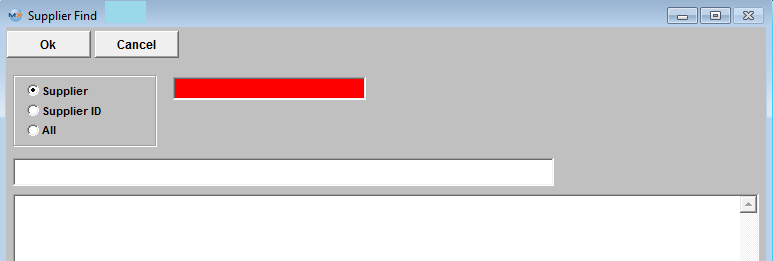
| Enter the password. The selection screen to the right will appear: |
 |
|
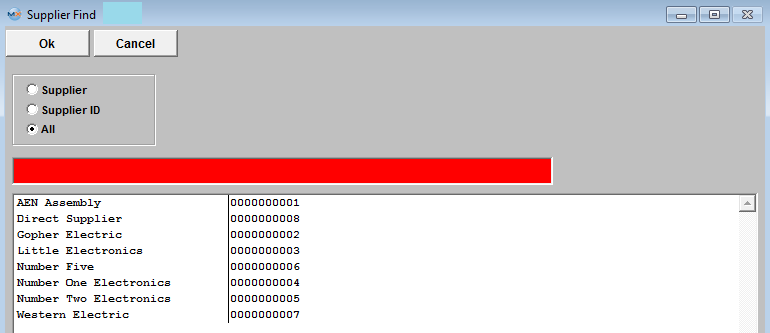
If you select All, the selection screen to the right will appear:
Enter the Supplier or Supplier ID into the red box or highlight and double click.
|
 |
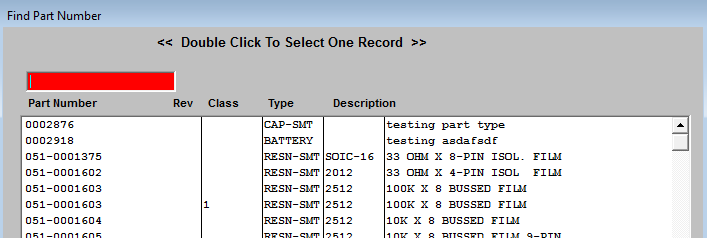
Once the Supplier is selected, a list of parts will appear:
|
Enter the applicable Part Number into the red box or highlight your selection and double click.
The part number selected will populate the screen, as displayed below:
|
 |
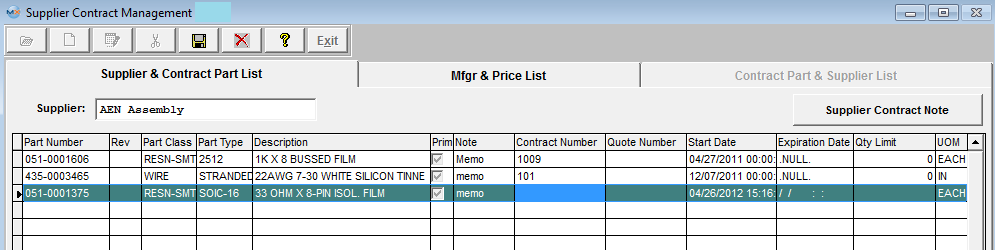
If you want to add a note regarding the supplier contract, depress the Supplier Contract Note button. Depress the Edit button. Enter in the note. Depress the Save button. Depress the Exit button.
If you want to add a note regarding the Part Number, click on the Note column. Depress the Edit button. Enter in the note. Depress the Save button. Depress the Exit button.
Enter in a Contract number, a Supplier’s Quote number, and a start date for the contract. Today’s date will default, but you can override it. Enter in an expiration date. Enter in a quantity limit (the highest quantity which can be purchased).
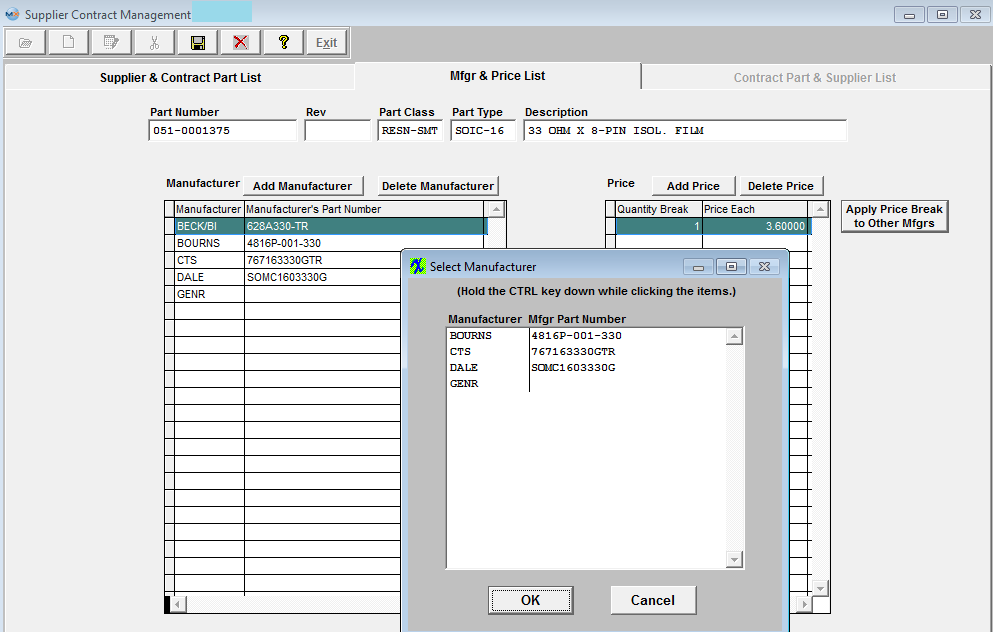
Depress the Manufacturer & Price list tab. The following screen will appear:
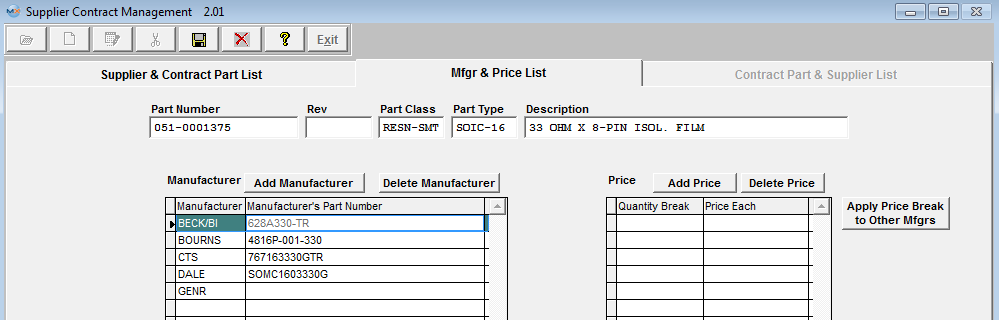
Note that the Manufacturer and Manufacturer’s Part Number per the Inventory Master have populated the left hand of the screen.
 |
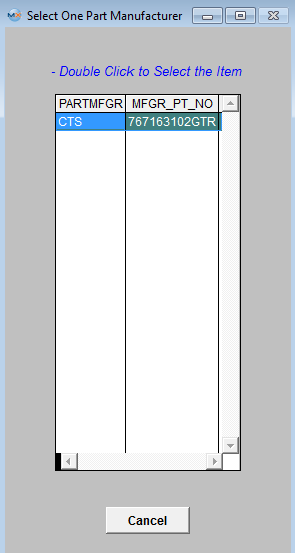
If there are Manufacturer's listed in the Inventory Control module that are NOT being displayed on the Mfgr & Price List tab, user may depress this button and a list of manufacturer(s) listed in the Inventory Control module that are NOT being displayed in the Mfgr & Price List tab, will be displayed and user at this time may add them by double clicking on them.
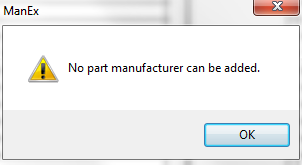
If there are no Manufacturer's listed in the Inventory Control module other than the ones listed on screen the following message will appear:
|
 |
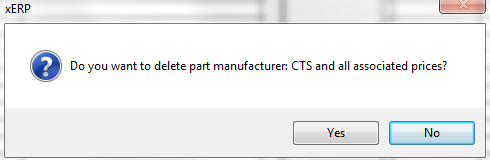
If user would like to Delete a Mfgr from the Mfgr list, highlight the Mfgr and depress this button, the following message will appear:
Depress "Yes" to continue the deletion process or "No" to cancel the deleting process.
|
 |
While the Manufacturer is highlighted, depress the Add Price button on the right hand side of the screen. Enter a quantity break and the Price Each for that quantity. Continue depressing the Add Price button on the right hand side of the screen, entering a quantity break and the Price Each for that quantity until ALL of the Pricing breaks under the contract are entered.
|
 |
If user would like to Delete a price, highlight the record and depress this button, and the following message will appear:
Depress "Yes" to continue the deletion process or "No" to cancel the deleting process.
|
To apply Price Breaks to other Mfgr, user has the option to apply them individually or deperss this button 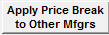
If user elects to Depress the "Apply Price Break to Other Mfgrs" the following screen will appear:
Select the Mfgr(s) and depress OK to continue or Cancel to abort screen.
Depress the Save record action button.
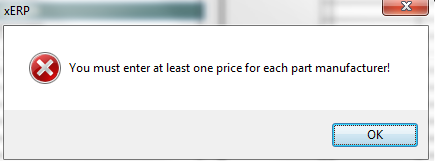
NOTE: Users MUST enter Qauntity Break and Price Each for every manufacturer listed or they will receive the following message and will unable to Save the record until ALL Quantities and Pricing breaks have been entered for the part highlighted.
Depress the Contract Part & Supplier List tab:
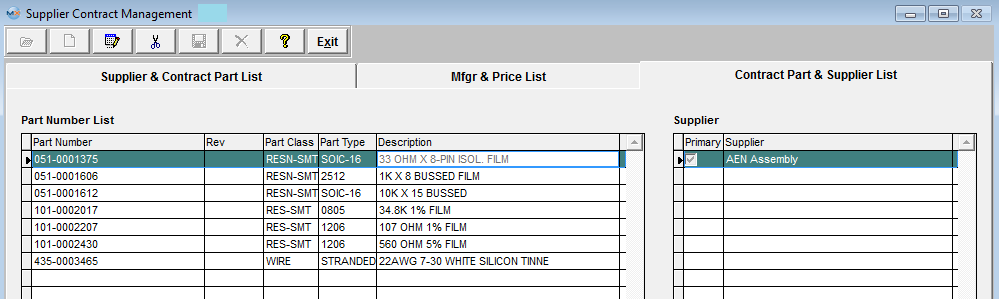
Note that the Part Number you selected in the Supplier & Contract Part List tab is listed in the Part Number list. Highlight that Part Number. The primary supplier for that part will display, as illustrated above.
|