| Add a New Inventory Allocation |
|
|
Enter the SQLMANEX.EXE (within the ManEx root directory)
This action will then prompt the user for a password
|
 |
|
The following screen will be displayed, select Inventory Management/Kitting, Allocating & Shortage Management/Inventory Allocation Module
|
 |
The following screen will be displayed:

|
Depress the Add record action button and the following selection.
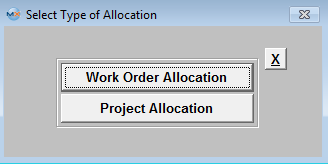
Select “Work Order Allocation” or "Project Allocation" button.
Once the type has been selected user will be prompt for their password:
|
 |
After entering a password, the following screen will appear when selecting "Work Order Allocation (a similar screen will appear if you select "Project Allocation"):
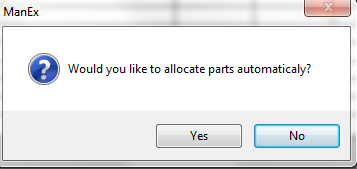
Select the Desired Work Order and the following prompt will appear:

If you select “YES” then all available inventory will be allocated automatically to the selected work order. Edit any quantities allocated by selecting the Part Number (highlighted) in the upper screen table and changing the Alloc Qty for the desired manufacturer in the lower part of the screen. Save after all allocation editing has been completed.
If you select “NO” then the system will list out all parts used within the Work order (per BOM) and require the users to go through and manually allocate inventory to each desired part.
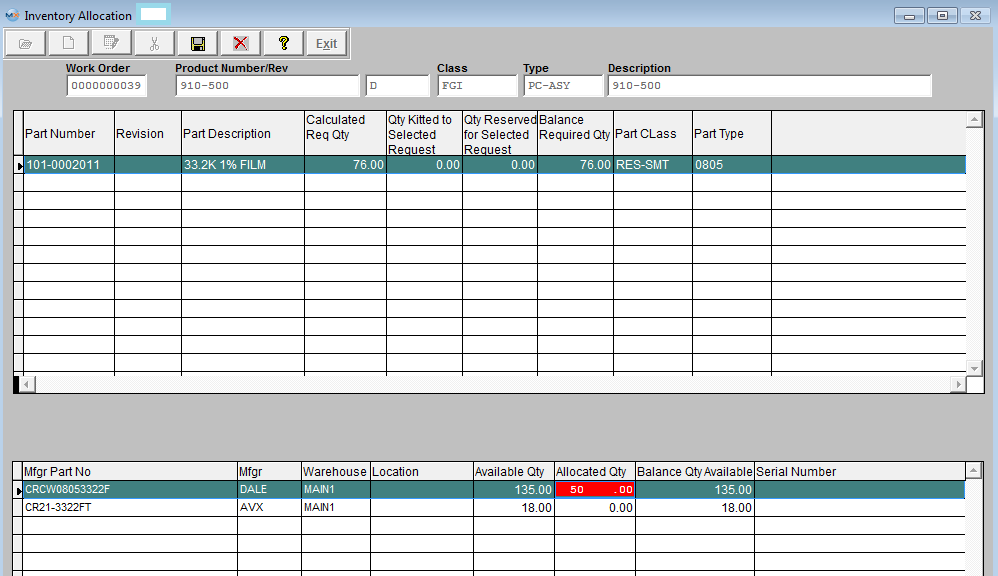
Particulars regarding that Work Order will populate the screen as displayed below:
Highlight the desired part number you want to allocate. Only Approved AVL information for that particular part will populate the lower portion of the screen.
- Enter the amount you want to allocate in the Alloc Qty column.
- Once all parts have been allocated, depress the Save record action button.

Note: The Inventory Master should have automatically updated, and will now display the amount allocated (“reserved”).
|
|
|
|
|
|
|
|
|
| Article ID: 5132 |