After Finding the Work Order. The following screen will appear, listing the Work Order and Build Qty. The Add record action button also becomes available.
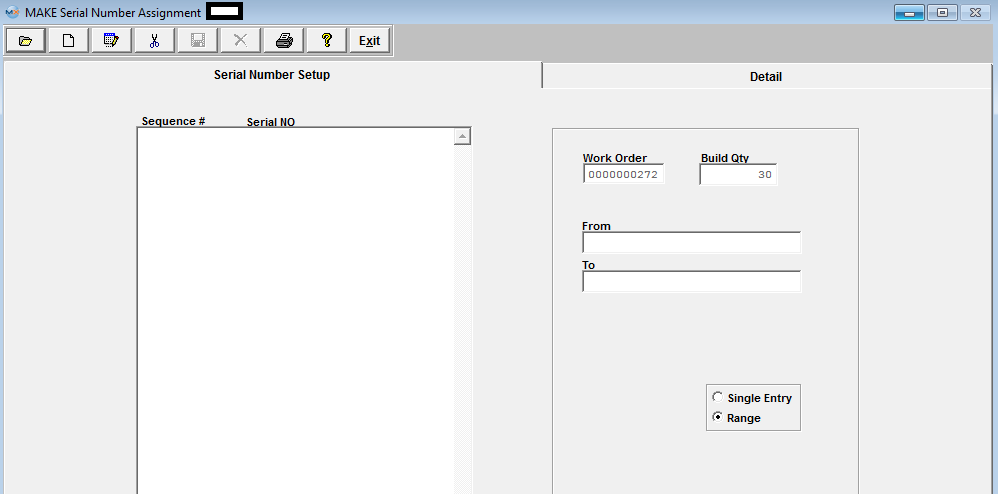
Depress the Add record action button. Enter in the password. Select Single Entry or Range method of assigning serial numbers by choosing the appropriate radio.
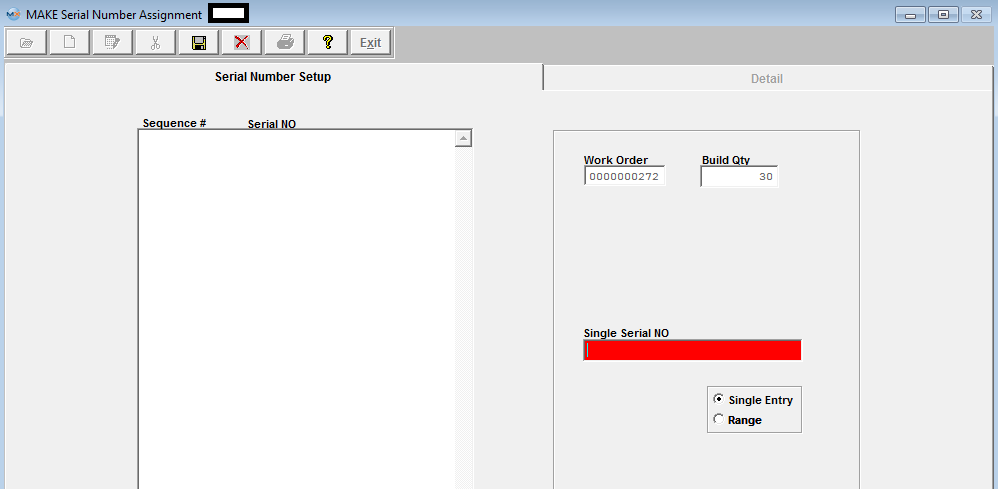
If you select Single Entry, the following screen will display, only allowing you to type in one Serial number at a time.
If you select Range, the following screen will display, allowing you to type in From and To Serial numbers.
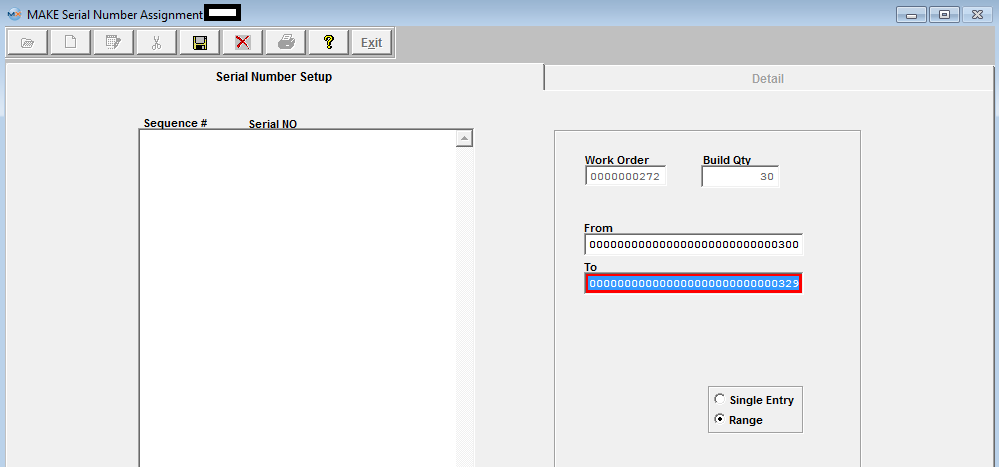
Note: The system will force individual entry for serial numbers with prefixes or characters. If user enters both character and number in one field, then it is hard to know which part (character or number) needs to be increased first. So the system cannot predict how the range is intended to increment: For Example if user enters a SN range of A101 to Z110. The system does not know how the user wants the range setup A101, B101, C101 or A101, B102, C103, etc. (We allow 30 characters for a SN)
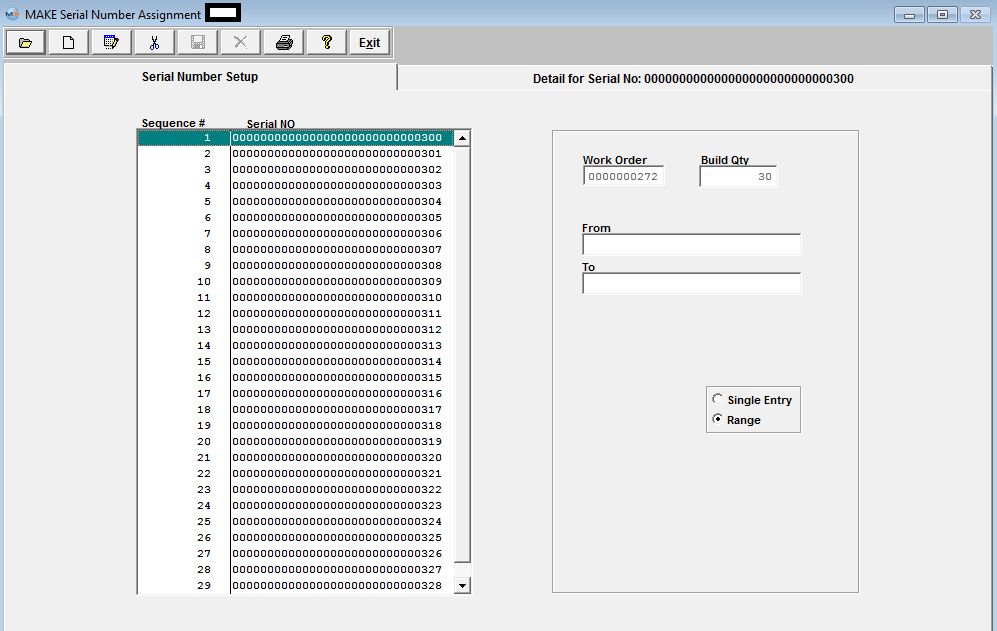
Depress the Save record action button and the range of numbers will populate on the left side of the screen. As displayed below: If you depress the Abandon changes action button the screen will abort and the serial numbers will not be saved.
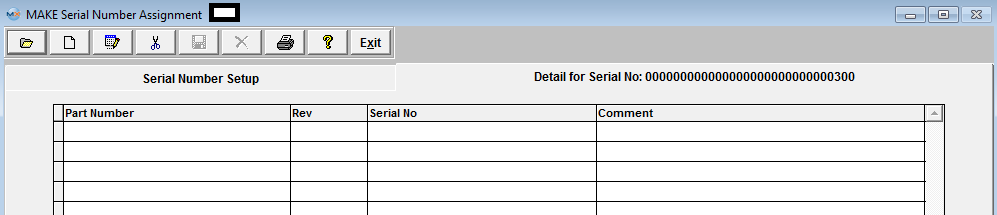
Detail for Serial Numbers
To enter detail for serial numbers, highlight the pertinent serial number and then depress the Detail Tab. The following screen will appear:
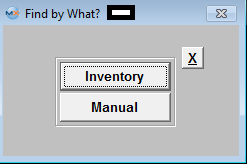
| Depress the Add a record action button, and the"Find by What?" screen will be displayed: |
 |
|
|
|
If you select the Manual button, the Detail screen appears and you may manually enter in a part number.
|
 |
|
If you select the Inventory button, another selection screen will be displayed.
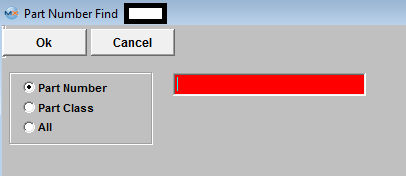
Select the desired Find: by selecting the appropriate radio button - Part Number, Part Class, or All.
Enter the information into the red box, depress the Enter key and the information will populate the screen.
If 'ALL' is selected a screen will be displayed listing all the Part Numbers in Inventory, in numerical order by Part Number, Revision, Description, Part Class and Part Type.
|
 |
Enter in Serial No and Comments if applicable.

Depress the Save record action button to save, or depress the Abandon changes action button to abandon changes.
|