|
|
Enter the SQLMANEX.EXE (within the ManEx root directory)
This action will then prompt the user for a password
|
 |
|
The following screen will be displayed, select Accounting/Accounts Receivable/Bank Deposits
|
 |
The following screen will be displayed:
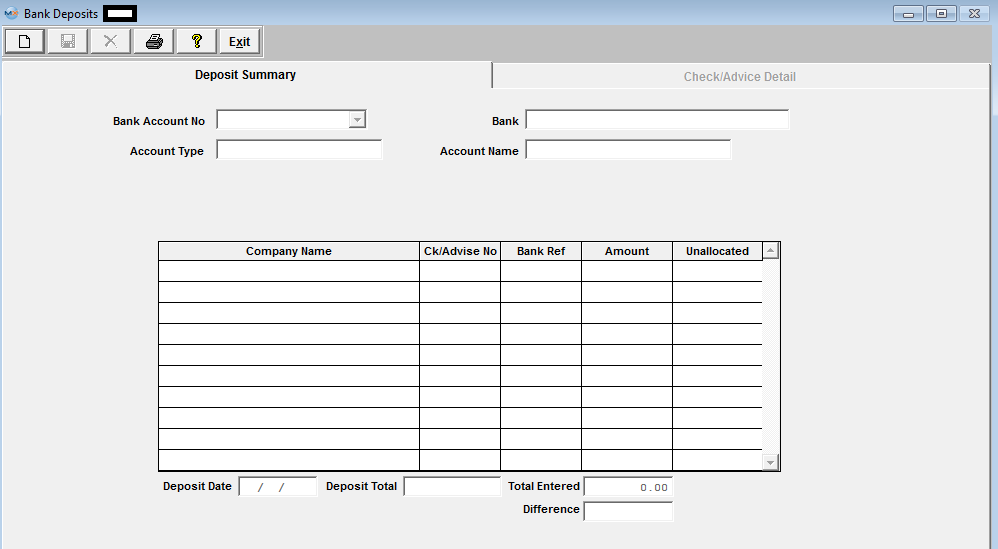
Depress the Add record icon. The prompt will activate the account number field, and the user enters the Bank Account to which the deposit is being made. Clicking on the down-arrow displays all Bank Accounts entered in the Bank Accounts Setup, and the user selects one by moving the cursor to the correct account and pressing the enter key.

Once the account is selected, the Account Type, the Bank, and the Account Name information will be displayed for the selected account.
The Deposit Date will default to the current date, but may be edited as required.
The user enters the total amount of the deposit at the bottom of the screen, and ManEx will track the total of the Deposits as they are entered and the difference from the total amount.
The Add Line button will then be displayed allowing the user to enter information about the Deposit.
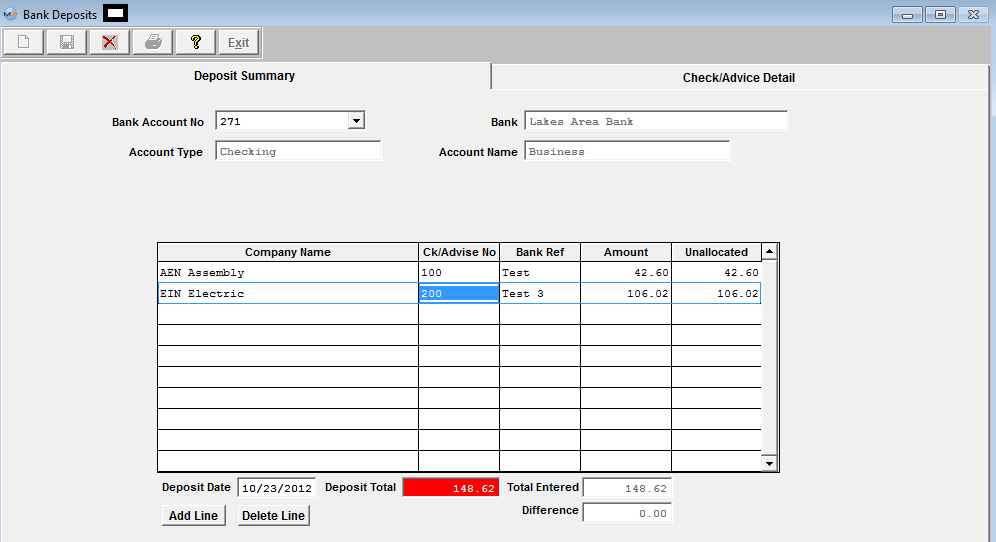
After pressing the Add Line button, the prompt is placed on the Company Name and the Delete Line button is enabled. Clicking on the down-arrow next to the Company name field lists the names of all of the companies from which the deposit might be received.

After entering the Company Name, the user enters the Check/Advise Number, the Bank Reference Number and the amount of the Check. The unallocated amount will be automatically entered, and the Check/Advice Detail screen tab becomes enabled.
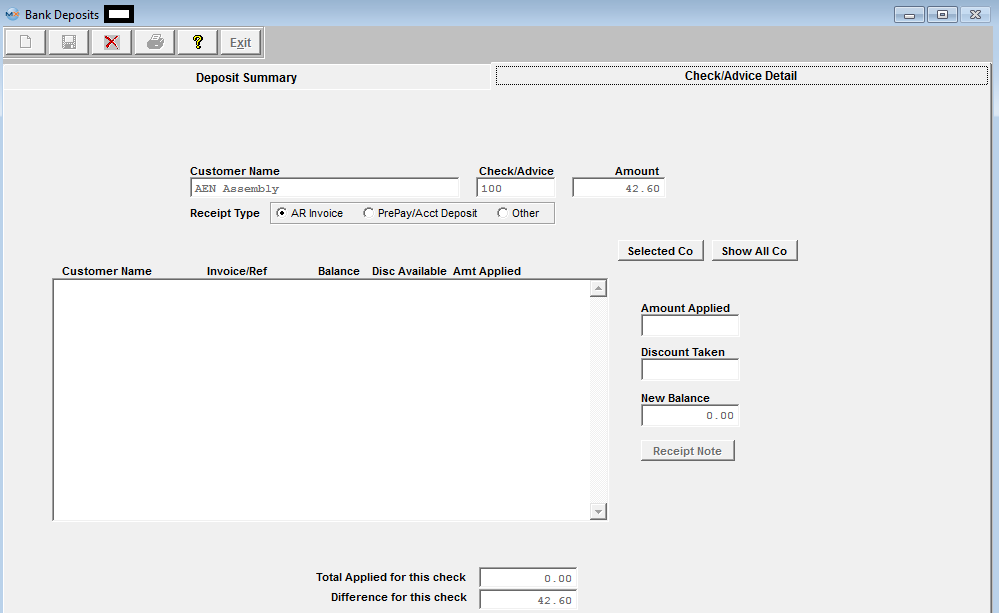
CHECK/ADVICE DETAIL
Selecting a line by highlighting on the initial screen and pressing the Check/Advice Detail tab displays the screen on which the cash is to be applied for the Check selected.
The system does NOT allow the user to enter in a positive amount against an existing Prepayment or Credit Memo.
|