| Find a Manual AP Entries |
|
|
Enter the SQLMANEX.EXE (within the ManEx root directory)
This action will then prompt the user for a password
|
 |
The following screen will be displayed, select Accounting/Accounts Payable/ Manual AP Entries
|
 |
The following screen will be displayed:
|
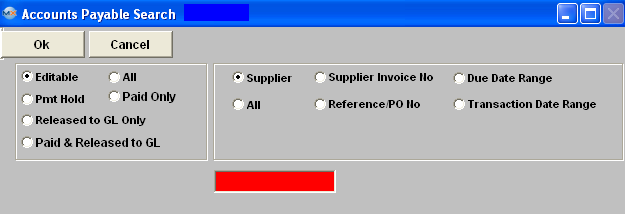
Depress the Find record action button, the following screen will be displayed:
Select the desired Filter: by selecting the appropriate radio button– Editable, All, Pmt Hold, Paid Only, Released to GL Only, or Paid & Rel to GL.
Select the desired Find: - by selecting the appropriate radio button – Supplier Name, Supplier Invoice No., Due Date Range, All, Reference/PO No., or Transaction Date Range.
Enter the information into the red box, depress the enter key and the information will populate the screen.
|
 |
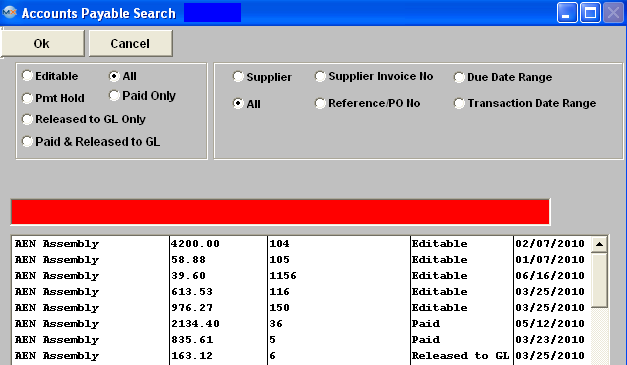
If user selects ANY of the Filters and Find by All - a screen will appear listing all the Manual AP Entries per the filter selected, alphabetical by Supplier name, Invoice Amount, Invoice number, AP status, and Invoice date.
The user has the option to view the AP Manual Entry by either entering the Invoice number into the red box, or scrolling down the list, highlighting the desired record and double click on it.
|
 |
Filter:
| Editable |
This means that most of the fields are eligible for changes. |
| Pmt Hold |
These have been put on payment hold. |
| Released to GL Only |
These are still open in the A/P Aging and are unpaid. These can’t be edited because they’ve already been released to G/L. |
| Paid & Rel to GL |
Checks have been written for the invoices and they have been released to the G/L. These can’t be edited. |
| All |
All Records |
| Paid Only |
Checks have been written for these invoices.These can’t be edited. |
Sort By:
| Supplier |
Must Enter in The Supplier Name |
| Supplier Invoice No |
Each Supplier Invoice Number |
| Due Date Range |
Enter Specific Date Range |
| All |
All Records |
| Reference/PO No |
Enter Reference No or PO No |
| Transaction Date Range |
Enter Specific Transaction Date Range |
Once the selection is made, depress the "OK" button. The screen will update with data from the selection:
|
|
|
|
|
|
|
|
|
| Article ID: 4291 |