|
|
Enter the SQLMANEX.EXE (within the ManEx root directory)
This action will then prompt the user for a password
|
 |
|
The following screen will be displayed, select Production/Work Order Management/Work Order Management
|
 |
The following screen will be displayed:
To ADD a new work order, depress the Add Action button. The user is first prompted for the appropriate password:
|
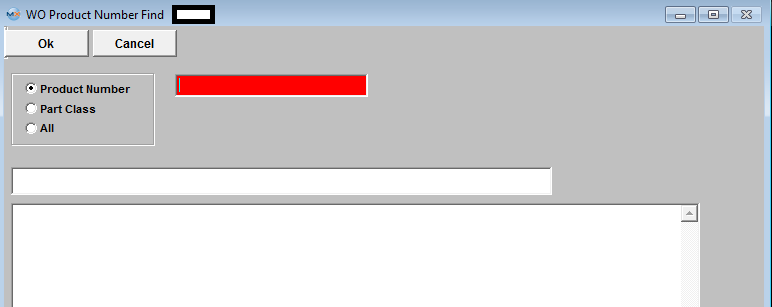
The following screen will be displayed:
You may select to find by Product Number, Part Class or All.
|
 |
|
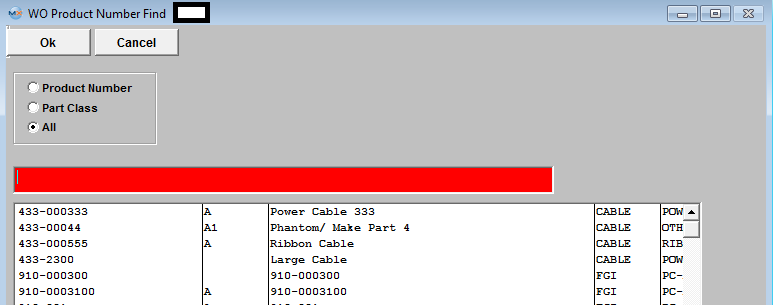
If the user selects the "ALL” radio button, a listing all of the part numbers appears. Select the part by typing the part number into the red box or highlighting and double clicking.
|
 |
Note: If the Product Number you are looking for does not appear in the Find screens listed above you may want to check the Part Source of the Product number you are looking for. ManEx does NOT allow a Work Order to be created for a Make/Buy Product, due to MRP calculating incorrect demand and showing incorrect message with safety stock.
Once a Product Number is selected the screen will be populated with the part information from the Inventory Control Module.
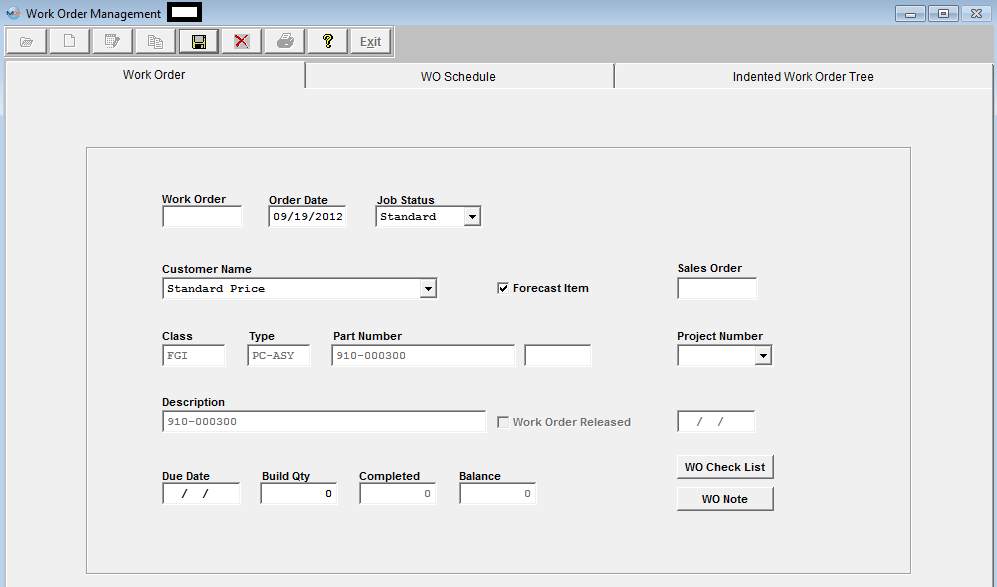
If the work order numbering is set to manual, the first prompt is for the Work Order Number. MANEX will enter the current system date as the Order Date, and the user may revise the date if desired.
|
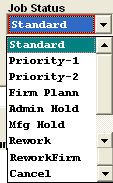
The next field to enter is the Job Status. Clicking on the down-arrow on the right side of this field activates a pop-up screen providing a list of status from which to select.
The system defaults to Standard. Standard is the ordinary work order status. Priority is set up as a make ahead of all other orders, 1 being the most important and 2, the second most important. Admin Hold is an order on hold due to customer credit, etc. Mfg Hold would prevent the order from being kitted and assembled. Rework is to fix or redo a previous order (See Article #1520), Rework Firm or Cancel.
The user may put orders on Admin or Manufacturing Hold without affecting MRP. Manufacturing hold on a Work Order will disallow movement of the parts through SFT.
Rework = users will use this status if they do not want to have it included as available to meet demands.
ReworkFirm = users will use this if they want to have it included as available to meet demands. The only thing is that they will have to be sure the due dates for a rework firm precede any demand that was created to use those parts.
|
 |
Serial Number box. If this box is checked, the units must have a unique serial number assigned. (Note: Serial numbers are assigned in the Work Order Serial Number Control Module).
Sales Order Number. A Sales Order number will be displayed if the Work Order was created within the Sales Order Mgmt module. If you are entering a Work Order through the Work Order module, you can manually link an existing Sales Order to the Work Order. Only if the Sales Order and Work Order is for the same customer and same product number. Keep in mind though that even if you have the SO linked to a WO does not mean that the quantities will always be the same. The link is for reference only between the two modules and they are still individual records so when any changes are made to either the SO or the WO the change will not update or be carried forward to the other. A message is displayed to the users that they will have to make the same changes to the WO.
|
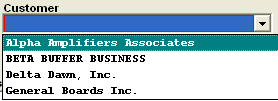
The next field to enter is the CUSTOMER. When Adding a new Work Order, the user may select a Customer from the pull down or begin entering the customer name, and ManEx will immediately begin tracking the key-entry to bring up the customer with as few keystrokes as necessary to identify the customer. If there is no customer to be associated with the order, the user may select Standard price.
If the Part Number selected is setup in the Sales Price List Information module the customers from the customer list within this module will be the only customer(s) to appear in the pull down.
If BOM is assigned to specific customer, and if there is CONSG part in the BOM -- Only that customer will be available in the WO customer list
If BOM is assigned to specific customer, and no CONSG parts in the BOM -- Default to that customer, but all other customers are available to be selected.
If BOM is not assigned to specific customer, all customer should be available.
|
 |
If the work order is ready to start being moved through SFT (material obtained and shortages at a minimum), then the user may check the Work Order Released box, which will allow the material to be moved through Shop Floor Tracking. If MRP is used, the demand for the material will be generated, but the work order cannot begin production. To see a list of unreleased work orders, request Back Log Report by Work Center as discussed in the Reports section.
After that, the user enters a Due Date for the order (the date due of finished goods), and the Build Quantity. The shipped quantity will be set to zero, and the balance due to the same as the work order build quantity.
Work Order Schedule Tab
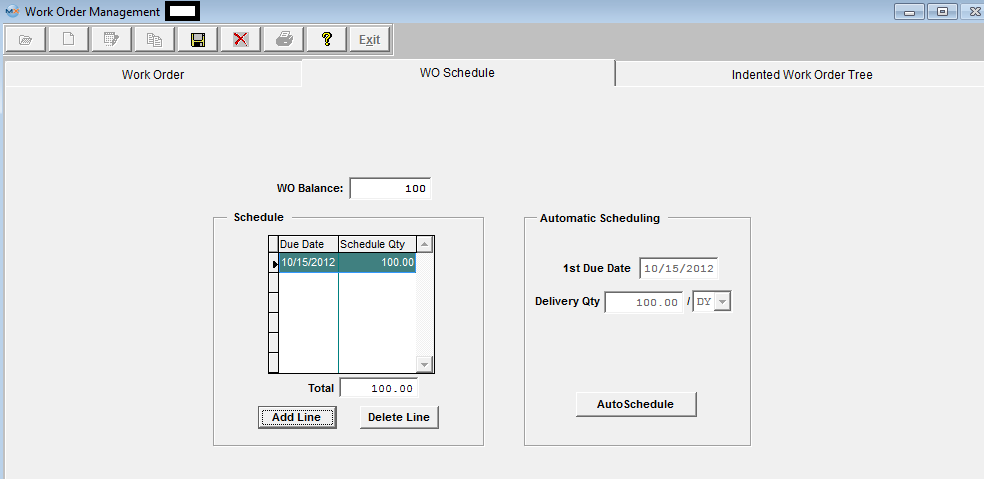
After all the information has been entered in the Work Order screen, depress the WO Schedule tab. The following screen will appear: Note: Keep in mind that this is for your reference only - this screen does not affect any other portion of the ManEx system.

There are two modes available for completing a scheduled delivery for a product: Automatic and Manual. In the Automatic mode, MANEX will take a beginning date and a quantity to be delivered each period (Days, Weeks or Months) and schedule out the delivery.
The following activities are available:
Automatic Scheduling. Pressing this button enables the scheduling box and places the default lead time date in the 1st Due Date box. (The user may establish a default number of days in the System Setup.) The user can then use that date, or enter the first (beginning delivery) date the customer expects to receive the order. The WO Schedule tab allows the user to divide the shipment into multiple deliveries of equal parts. For example, if the order is for a total of 100 pieces, and the customer wishes delivery to be at the rate of 10 units each day, then the delivery quantity should be entered as 10. The next box allows the user to select the delivery intervals. The options are by day (DY), week (WK) or month (MO).
After selecting the delivery interval, pressing the SAVE button creates a line for each delivery date in the sequence requested.
In this WO Schedule tab, the user may further edit, delete or add lines.
Manual Scheduling. Pressing the Add Line button enables the delivery schedule box and places the cursor in the Due Date box. The user can then enter the first (beginning delivery) date the customer expects to receive the order. Next, the Ship Date (the date the order is to leave the user’s dock) will be entered by MANEX based on the transit days entered. This date can then be modified by the user if a different date is desired. Then the scheduled quantity is entered. The Shipped quantity will be completed by MANEX when the line has material shipped against it. Additional lines may be added or deleted by pressing the appropriate button. The total number of units scheduled will be displayed at the bottom of the box, so the user can verify all units have been scheduled.
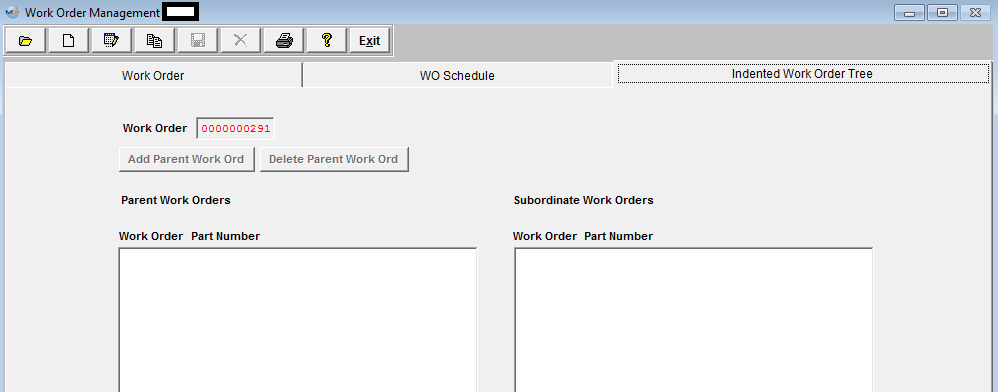
Indented Work Order Tab
If the user has multi-level products, and there are other work orders upon which the current work order depends having material, then the Indented Work Order tab will allow the user to establish relationships between those work orders and the current one.
Depress the Add Parent Work Ord button. A red box will appear, as illustrated below:
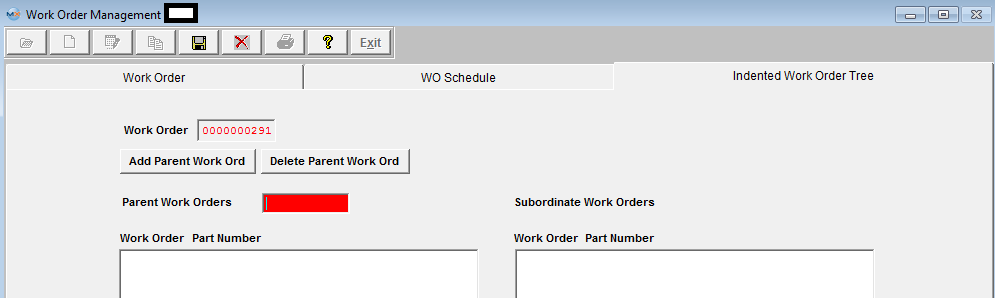
Type the Parent Work Order number into the box.
After entering a valid work order, the user is presented with a screen completed with the work order information, but with a blank work order number (if numbering is manual). After entering the work order, the schedule and quantity, the new work order may be saved.
Once all information is entered, the user may either Save by depressing the Save Record action button, or Abandon Changes by depressing the Abandon Changes Action buttons. |