| Make/Buy |
Make/Buy is setup to allow users to have a part in the system that they wished to BUY but also keep documentation within the system (BOM). If the Part Source is a MAKE and this box is checked, the assembly MUST be purchased from an outside source. If a Part is marked as Make/Buy within Inventory the MRP will only give PO Actions and that product will not be available for selection within the Work Order Management module, (due to MRP calculating incorrect demand and showing incorrect message with safety stock). If the part souce on a product is originally setup as a MAKE the user WILL be allowed to edit the record and change the part souce to Make/Buy. For further details see Article #3289 .
|
| Part Class |
This is a general part, product or item classification that must be selected from the drop-down box. If an appropriate choice is not available when entering a new item, you may add a new part class in Inventory Part Class, (examples of Part Classes are BATTERY, DIODE, FUSE, FILTER, IC-SMT, CAP-SMT, RES-TH, etc.)
|
| Part Type |
Type is a sub-classification of Part Class. If an appropriate choice is not available when entering a new item, you may add a new part type in Inventory Part Class (examples of Part Types for the Class IC-SMT would be 0603-5%, 0805-10%, 0805-5%, 1206-5%, 1210-5%, Lot-Coded, etc.)
If the Part Type selected is Lot-Coded, the user will be required to enter a lot number, date code, expiration date (optional) and internal lot number information whenever performing a transaction for the part. If the user wishes to maintain inventory to this level, then they MUST enter information each time a part is moved. This will allow complete traceability by date and lot code for products assembled. The user will be able to determine all work orders or sales orders in which a certain date code was used. Users should use caution when changing the lot code tracking status. When lot code tracking status is change the entire history of the lot code is removed from system.
NOTE: A user does have the option of leaving the Part Type blank, however if this option is selected the prefix for the part number will be omitted. There is no reason to enforce part type if a user doesn’t want to have that kind of detailed classification. If the user decides to leave the Part Type blank they will receive a message and at this point they have the option to continue or go back and pick a Part Type
Manex uses the Part Class and Type as an extension to the description of the part. Therefore Class and type will be displayed throughout the system on screen and in reports as an extension of the description.
|
| Description |
There are 45 characters available to put descriptive data about the item being entered that is not already in Part Class and Part Type. For instance, in the previous figure the Part Class and Type already show that it is a RESN-SMT 2512 so this information need not be repeated in the Description. We suggest when entering the description, that you be consistent with your capitalization and punctuation. Some of the screens and reports can be sorted by description so the more consistent you are the easier it will be to use the system in the future.
|
| Material Type |
This field is an Item fields which is repeat at the top of all Tabs to display the selected Item.
If the Inventory Material Type is set to "Auto" (within the Material Type Setup), everytime the user modifies the AVL material type, the program will update the Inventory Material Type automatically.
>> If any of the AVL material type for the item is 'Unk' - the item level type will be 'Unk'
>> If any the material type is the same for all of the AVL's of the same item, the material type for the item will be the same as material type of the AVL's without a suffix. For example: if AVL types is anyof the 'LF-P/N', 'LF-Date', 'LF-Mark', the material type for the item will be 'LF'. If AVL's material type is 'ROHS-P/N', 'ROHS-Date', 'ROHS-Mark', the item's material type will be 'ROHS'
>> If any of the material type of the AVL's for the same item are different and none of them is 'Unk' then the type of the item will be 'LF'
Any changes to the AVL material type that drives the item material type to a lower level will display a warning.
If the control is set to "Manual", then the user will be able to modify the Inventory Material Type from the Material Type pulldown. Keep in mind that the program will NOT validate if the material type in Inventory and AVL levels are in sync.
The AVL Material Type is carried forward for the consign part when the consign part is first added to the system or when new AVL was added to the internal part and the user elects to add this AVL to the existing consign parts. If the user later changes the Material Type on the internal part, the change is NOT carried over to the consigned part.
|
| Changed |
This field will display the date of the last change to the material type. |
| Initials |
This field will display the User ID of the user that made the last change to the material type. |
| Serialize |
This box will be available only if the option to use Serial Number Tracking in Shop Floor Tracking Defaults is set up.
The system allows this box to be check for a MAKE or BUY part. If this box is checked for a BUY part, all components are being tracked by a serial number that was assigned to the part at time of receipt. If this box is checked for a MAKE part, the FG assemblies will be tracked by the serial number through complete process. Note: Once a serial number for a MAKE part is created, we don't allow user to turn off the serialized checkbox anymore, even if there is no qty on hand and all accounting records are cleared. This is so no history of Shop Floor tracking, shipping, RMA’s, etc. . . . for the Make Parts are lost.
If a user changes a non-serialized part to a Serialize part the system will check. * If the part has allocated qty, (user has to un-allocate parts before the system will allow user to check the "Serialize" box). *If the part has any OPEN kit (kit in process), (user has to de-kit or close kit before system will allow user to check the "Serialize" box) *If the parts is a BUY part and has un-reconciled PO (user has to reconcile all receipts before system will allow user to check the "Serialize" box).
After all these criterias are passed, if the part has quantity on hand, the user has to enter the serial numbers to match the quantity on hand.
Note: Users have to have special access in order to modify this checkbox, this access is assigned through Security/User Rights.
|
| Status |
All items must be Active in order to buy, receive, issue, invoice or ship. Use Inactive Status to remove items from use that have already had transactions against the Part Number. Use Delete button to delete Items with no transactions. Changing status from Active to Inactive (for a Make Inventory part) will NOT change BOM status. User will have to change BOM status seperately. Changing from Inactive to Active status can be used to release items from Engineering. Note: If WIP (Work-in-Process) exists for a part the system will not allow the part status to be changed. This will prevent any possiblity's of qty on hand being returned to an inactive part if the users would happen to dekit. |
| Part Number |
Item/Part number is a unique identifier for every Item Master record entered in the database. Part numbers can be setup to be manual numbered, or auto assigned to all items except MAKE assemblies, or all items including MAKE assemblies (within the Number System setup module). The standard part number is a 3-digit dash seven digit format where the three-digit prefix is used to define the part class, part type setup in the Inventory Part Class setup module to work with auto or manual numbered parts and assemblies. A manually assigned part number can be 25 characters. Alphanumeric part numbers are permitted. The revision field is 4 characters, also alphanumeric. ManEx uses separate assembly and revision fields making it easier to group all revisions of the same assembly and verify that the correct version is selected for production
|
| ABC |
|
| Stock/BOM UOM |
This is the Unit Of Measure (Foot, Inch, Each, Gallon, Quart, etc.) that is used to specify how much of the Item displayed or being entered is issued from Stock or is used in a Bill of Material for an assembly. ManEx tracks stocking units of measure within inventory, kitting, MRP, etc.
|
| Purchase UOM |
This is the Unit Of Measure (Foot, Inch, Each, Gallon, Quart, etc.) that is used to specify how the Item displayed or being entered is purchased from a supplier.
NOTE: When creating a PO for an item with different purchasing and stocking UoMs, be sure to enter the MRP suggestion into the Stocking qty field rather than the purchasing qty field. The system will automatically convert the stocking unit into the purchasing unit for the purchase order qty.
For example if the buyer is creating a PO for an item that is used by inches but sold by the foot, the user would enter the 24 inches into the stocking qty field and the PO would automatically convert it to 2 feet in the purchasing qty field. So the supplier deals in feet, but ManEx deals in inches. The conversion between the two are established in the Unit of Measure & Conversion module.
Once the items have been accepted into inventory it is then converted over to Stock UOM and from that point forward everything within the system is using the Stock UOM.
ManEx DOES NOT recommend changing either of the UOM's if the part has a qty on hand. See Article #3414 for further detail.
|
| Package |
This field defines how the components are to be packaged (ie. Reel, Tray, 6-Pak, Ream, Individually, etc.) when it is delivered. This defaults to what is setup in the Inventory Part Class setup. User can edit this field to fit the component package as it is purchased for your organization. This will default to the PO Screen. The buyer has the right to override the package definition in the item master or on the PO screen. (ie. Reel, Tray, 6-Pak, Ream, Individually, etc.)
|
| Last Changed |
This captures the date,and time from the password of the individual making the changes to this screen and/or changes to the fields displayed on this screen from outside modules. Anytime an edit/save occurs this field is updated. Note: This field will NOT be adjusted from outside modules that change the costs, such as the Purchase Order module or the Cost Adjustment module those Last Changed dates will be displayed in the Last Changed fileds displayed next to the costs. |
| By |
This captures the User ID from the password of the individual making the changes to this screen and/or changes to the fields displayed on this screen from outside modules. Anytime an edit/save occurs this field is updated. Note: This field will NOT be adjusted from outside modules that change the costs, such as the Purchase Order module or the Cost Adjustment module
|
| Buyer |
This field is automatically filled in from the information entered in the Inventory Part Class setup module. This field is used in the MRP lookup as a sort field to allow a buyer to find the parts they are exclusively responsible to purchase. If a buyer leaves or is replaced, there is a global replacement of one buyer to another located in the System Utilities.exe/Change Parameters for the Part/Class .
|
| Mgmnt Lock/Blocked by Mgmnt |
Users MUST have special access in order to modify this checkbox, this access is assigned through Security/User Rights.
If locked caption will change to "Blocked by Mgmnt" and ALL users will have access to the screen, but only those with complete access to inventory can make changes to the item master. Other users will NOT be able to edit the record until the Approved users remove the lock. Fields changed when adding a PO, such as purchase lead time and min/mult orders are back written to the item master. The item master notes are only back written to the item master if the user has edit rights to inventory. The internal and consigned parts have seperate controls.
Note: If locked the caption will be displayed as "Blocked to Mgmnt", if unlocked the caption will be displayed as "Mgmnt Lock".
|
| Lock Date |
This displays the date and time the Approved user implemented the Mgmt lock. |
| By |
This is the users ID that implemented the Mgmt lock.
|
| Configuration Charge |
This is NOT a part of the standard cost total.It is a specific cost used with the MANEX Order Configurator module and represents any additional cost over and above the standard cost total.
|
| Run Scrap % |
This amount is added to the exact quantity used on an assembly to provide an overage to cover losses during running due to predictable machine and human losses.
|
| Setup Scrap Qty |
Setup losses may be added to the BOM requirement and Run Scrap for an item.For instance, an auto-insertion machine may use extra parts for alignment checks.
|
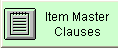 |
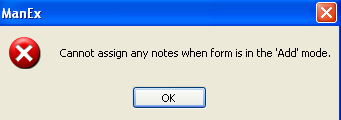
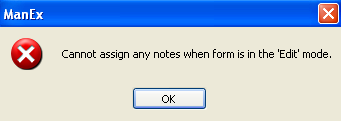
Depressing this button will bring up a screen listing Clause (s) from the Clause Setup module. User may select the desired clause (s) they would like added at the Inventory Part level. When this part is added to a PO any Clause(s) assigned will be defaulted into the PO Item Clauses. This button will be displayed in RED when clauses have been added. By design this button is ONLY editable in the view mode (See Article #3432 for further detail). If user trys to use this button in the add or edit mode the system will display one of the following warnings.
.
|
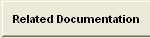 |
Depressing this button will give the users the ability to scan any related documents directly into the ManEx system and attached the document directly to the item in the ICM Module.For further detail see Article #2396. If this button is displayed in Red there is Related documents attached. |
| Inspection / Quality Spec |
Checking the box will cause the item to require inspection to whatever Quality Spec. shows in the Quality Spec box. The Quality Spec appearing in the box is entered in System Setup Inventory Part Class Setup. Any Part Type in a particular Part Class can have Inspection Required turned on or off.
|
| Certs Required/ Cert Type |
Checking this box will allow selection of Cert Type. Cert Type choices are Receive, Ship or Both. A typical Cert would be UL or CSA Certification on wire. Check the box and then depress the down arrow for the types to display. Select the desired type: Receive - Requires user to check the "Certificate Required" box has been Done at Receiving. Ship - Requires user to check the "Certificate Required" box on Packing List/SHipping. Both - Requires user to check the "Certificate Required" box at both Receiving and Packing List/Shipping.
|
| First Article |
Checking this box will alert the users that the item requires a first article check at receiving inspection |
| NC NR |
Checking this box, means that this part cannot be cancelled or returned. NOTE: This field is for reference only.
|
| Taxable |
Checking this box, will then default the Make Part as taxable when added to new Sales Order and/or Buy parts will default as taxable when added to a purchase order. |
| MRC |
The Material Risk Codes listed in the pull down are entered in the System Setup Material Risk Code Setup. This is to inform the users which items are Low Risk or High Risk (can not be cancelled or returned).
|
| EAU |
The quantity displayed in this box is the estimated Annual quantity. This is calculated from information entered into the ABC Types screen. |
| Last EAU Calculated |
The date shown in this box is the date the EAU was last calculated in the ABC Types screen. |
| PPM (Parts per million) |
This is a data entry field and is not involved in any calculations or used anywhere within the system at this point.It is planned to be used in the future to calculate the component level of PPM and then update the assembly PPM within the routing module.
|
| Length |
Specific length allowed for part.
|
| Width |
Specific width allowed for part.
|
| Depth |
Specific depth allowed for part |
| Weight |
Specific weight allowed for part.
|
| Material Cost |
For BUY Parts: This is the purchase price of the BUY part. For MAKE Parts: The sum of the STANDARD COSTS of BUY parts in the assembly. Whether or not setup scrap is included is a system setup option. |
| Labor Cost |
For BUY Parts: If the user wishes to include any preparation labor costs associated with a BUY part, like crimping, tinning testing. etc., those costs may be included here. For MAKE Parts: The user may include the labor associated with building the assembly the Value of Labor will then be rolled into the Std Cost for the Make Part |
| Overhead Cost |
For BUY Parts: Any additional costs associated with the labor, such as heating, lighting, etc., that the user may wish to include in the cost of the inventory value. For MAKE Parts: Any additional costs associated with the labor, such as vacations, sick leave, meeting times, etc., that the user may wish to include in the inventory value.
|
| Other Cost |
For BUY or MAKE Parts: This is up to the user to decide if there are any other costs that should be absorbed in the inventory value. |
| User Defined |
For BUY or MAKE Parts: This is a field where a user may define the field name and include any optional costs.
Note: for Labor Cost, Overhead Cost, Other Cost and User Defined . . . BUY Parts: Transactions will hit the GL for this value upon reconciling the Receipt for AP MAKE Parts: The user may include these extra Costs with building the assembly the Value of extra cost fields will then be rolled into the Std Cost for the Make Part, but there will be no break outs of these as far as GL Transactions are concerned (all Transactions will be for the Std Cost Value). |
| Standard Cost |
The STANDARD COST of an item is a calculated value determined by the sum of individual costs. These individual costs may be in any combination of the Material, Labor, Overhead, Other and User Defined costs. Each of the individual costs should have their own account number in the Inventory Setup , and those accounts will accrue the costs when material is added to inventory. User MUST have optional rights within the Security module to "Allow Updating Inventory Std Cost and Standard Cost Rollups".
If ManEx Accounting is neither installed nor active, then there is no value other than reference in including values in these fields.
Important Notice: It is very important to have standard costs (as determined above) in place for any part entering inventory. ManEx allows users to enter a standard material cost at the time of purchase, if one is not already entered. Without accurate cost data, the inventory value could be next to useless, and major variances would show in Purchase Price, Configuration and Manufacturing Variances. If the material cost if the assembly does not equal the computed sum of the standard costs of the components based on the system setup, a configuration variance will be accrued. Please note Standard cost is based on Stock UOM.
|
| Target Price |
This field is currently only a data entry field and will be reflected in the Purchase Order module for "BUY" or "MAKE/BUY" parts. This field is not editable for "MAKE" or "PHANTOM" parts. NOTE: To assign prices to products ("MAKE" parts), ManEx suggests using the Sales Price List Information module. This module allows users to enter prices by product and by customer so different customers can have different prices. This price will default into the sales order, but is still editable within the Sales Order module. |
 |
If the Part Source is a BUY, the weighted cost is calculated by dividing the extended total cost(s) by the total qty(s) from the total number of non-cancelled PO line items setup in the General Inventory Setup module or the total number of non-cancelled PO line items entered in theWeighted Cost - Last ( ) field). The Purchase Orders used are with a status of Open or Closed only, and goes by Order Date or Edit Date. You can choose what option it uses on the Inventory screen. You can also select the default use (Order Date or Edit Date) under General Inventory Setup .
Order Date: Order date on Purchase Order
Edit Date: Also known as latest version date (example if the original PO date is 1/3/06, but it was revised/edited on 12/5/06 it will use the 12/5/06 date), no matter what was edited on the PO. (if a user accidently selected the wrong PO to edit and had depressed the edit button, they could depress the abandon changes button to avoid the PO version date from being updated).
NOTE: The User has the option of changing the number of (Weighted Cost - Last ( )) purchase orders within the Inventory screen. Changing this number within the Inventory screen will change the Weighted Cost and also change the number of Purchase Orders displayed in the view screen. User cannot filter out non-received parts. Depress the (down arrow) to display the view screen. This screen allows user to Sort, Search and Drill Down to Selected Records.
|
| Last Changed |
This captures the date of the last change to the cost within this module and/or the outside modules such as the Purchase Order module and/or the Cost Adjustment module. |
| Purchase History By: |
This field allows the users to select which date "Order Date" or "Edit Date" on the PO to use when displaying the PO's in the Purchase History. The default is setup within the General Inventory Setup module.
NOTE: User has the option of changing the selection within this screen for a one time view and will reset back to the default once user exits the ICM module.
|
| Include PO with Status: |
This field allows the user to select the status of the Purchase Orders they would like to have displayed in the Purchase History. "Open and Closed (Approved)" or "New and Editing (Waiting for Appr.)" or "All". The default is setup within the General Inventory Setup module. PO;s with a status of Cancelled will only display when "All" is selected.
NOTE: User has the option of changing the selection within this screen for a one time view and will reset back to the default once user exits the ICM module.
|
| Show Last __ Purchase Order(s) |
This field allows the users to setup the number of Purchase Orders they would like displayed in the Purchase History. The default is setup within the General Inventory Setup module.
NOTE: User has the option of changing the selection within this screen for a one time view and will reset back to the default once user exits the ICM module.
|
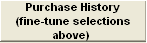 |
Once all the selections have been made, depress the "Purchase History" button and the following view screen will be displayed. This screen allows user to Sort, Search and Drill Down to Selected Records.
|