|
Enter the SQLSYSSETTING.EXE (within the ManEx root directory)
This action will then prompt the user for a password
|
 |
|
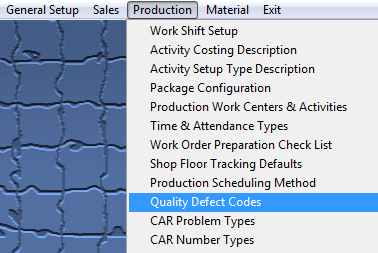
The following screen will be displayed, enter the Production/Quality Defect Codes Module
|
 |
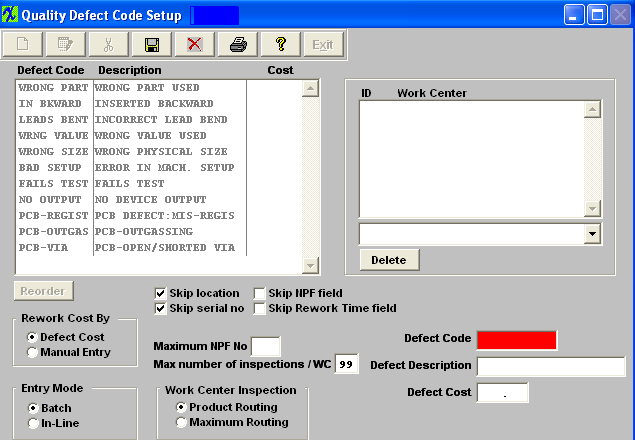
The following screen will be displayed:
Items may be re-sorted by dragging the box of the left side of the defect desired to the (vertical) position desired, upon exit the re-order will be saved. This order will be the order displayed in the pull downs when using this list in other modules within the system. Suggestion: Have the one most used at the top of the list.
The user initiates a new defect code by selecting the Add button from the main tool bar. Note: When creating a new Defect Code you will want the Defect Code descriptive as possible because this is what appears in the Pareto Chart in the SQC module information. NOTE: The "Defect Code" field is NOT editable once it has been saved.

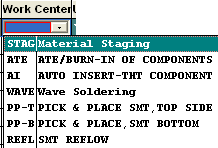
To associate a Work Center with a defect code, select the Edit button from the main tool bar and place the cursor in the ID Work Center window, as illustrated
|
 |
Enter in the maximum NPF number. Type in the desired number of times for Maximum number of inspections /WC.T his field is for serial number use only. If the user selects the “Skip Serial Number” field, this max number will be come invisible. In the Shop Floor Tracking module, Inspections section, once the pass number of a serial number exceeds the max number as set up here, a supervisor or special rights password is needed to continue.
When all changes have been completed, the user must select the Save or Abandon changes button from the main tool bar.
Select the Edit button from the main tool bar and work centers assigned to or deleted from the defect code. All fields are editable except for the "Defect Code" field.
When all changes have been completed, the user must select the Save or Abandon changes button from the main tool bar.
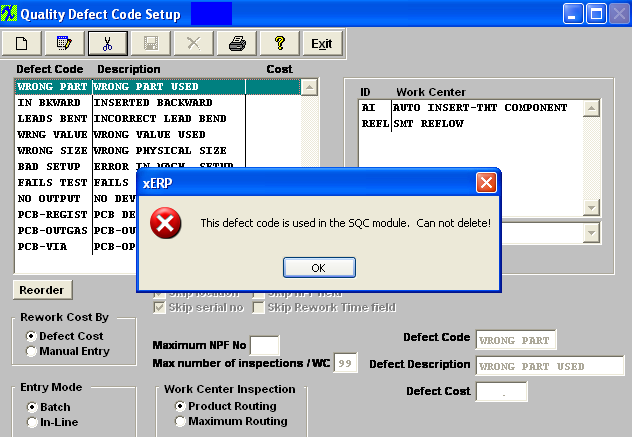
User may ONLY delete a Defect Code if it has not been used in the SQC module. This info needs to be retained for history/reporting purposes. If the defect code has been used in the SQC module user will receive the following warning when trying to delete the defect code.

If defect code has NOT been used in the SQC module the defect code may be deleted. User will receive the following confirmation to be sure they want to delete the Defect Code.
Depress OK to continue or Cancel to abandon the deletion.
Where Used: In all Statistical Quality Control tracking operations and reporting.
«Mark as Completed in RoadMap in Section B Item 3-h»
|