ArticlesArticles Most Helpful ArticlesMost Helpful Articles Language SettingsLanguage Settings LoginLogin
RSS Feeds
DrillDown Icon Table of Contents Back
 . . . . . . . . . . . . .
DrillDown Icon Utility
DrillDown Icon Sales Management
DrillDown Icon Inventory Management
DrillDown Icon Material Planning
DrillDown Icon Production
DrillDown Icon Shop Floor Tracking by Work Order
DrillDown Icon Prerequisites
DrillDown Icon Introduction
DrillDown Icon Fields & Definitions
DrillDown Icon How To .....
DrillDown Icon Reports
DrillDown Icon FAQ's - SFT
DrillDown Icon Test & Repair (T & R) (OPTIONAL Module)
DrillDown Icon Prerequisites
DrillDown Icon Introduction
DrillDown Icon Fields & Defintions
DrillDown Icon How To ......
DrillDown Icon Add
DrillDown Icon Shop Floor Tracking by Bar Code (OPTIONAL Module)
DrillDown Icon Work Order Management
DrillDown Icon Capacity & Scheduling (OPTIONAL Module)
DrillDown Icon Time & Attendance (OPTIONAL Module)
DrillDown Icon Job Costing (OPTIONAL Module)
DrillDown Icon Project Setup Module (OPTIONAL Module)
DrillDown Icon Quality/Engineering
DrillDown Icon Administration
DrillDown Icon eManEx
DrillDown Icon ManEx Minutes for All Modules
  Email This ArticlePrint PreviewPrint Current Article and All Sub-Articles
 
Add Test and Repair Information
When the user has completed the Defect information, they may enter the Test & Repair tab to enter more information about the part, or may depress the Open/Find record button to find this information at a later time. 


Depress the Open/Find record button and the following screen will appear:

Select to find record by:  Work Order Number or Serial Number 

If you select to Find by Serial Number the following screen will appear:
If you select to Find by Work Order Number the following screen will appear: 
Once a SN or WO No has been entered in the above screens the following screen will appear for user to select a transaction:
 
 Once user has selected a transaction the following screen appears displaying the record you selected:
 
 
Depress the Edit button and enter your password, user may at this time edit the Quality Inspection Entry info, the Defects Information, or the Test & Repair info: 
 
 
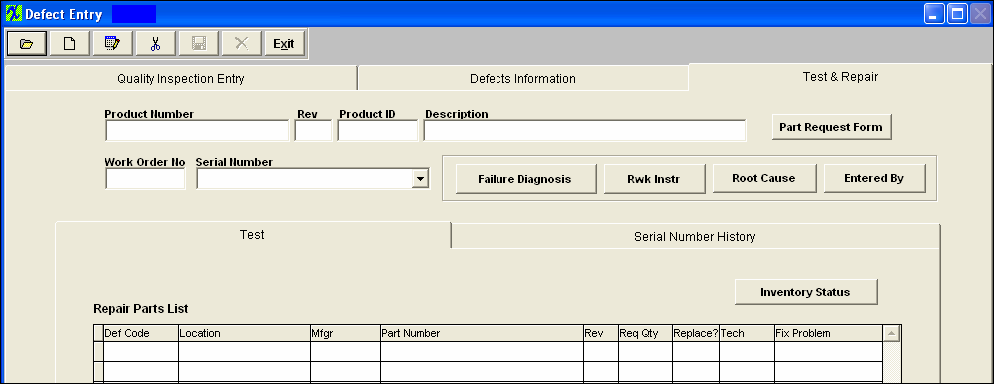
Depress the Test & Repair Tab: (System will only display information for one serial number at a time).  


In the edit mode user can edit the required qty, check the Replace? box, or select to Fix Problem from the pull down:
 
NOTE:  To have the initials of the technician who fixed the defect displayed, user must double click in the field. 


User may enter information in the Failure Diagnosis, Rwk Instructions, and/or Root Cause (these 3 fields are text fields).   Within this screen you may also View the "Entered By"  or  "Inventory Status" of Part Number.   


Depress the Save button to save changes or Depress the Abandon changes button to abandon changes. 


User may at this time print the "Part Request Form"  which will need to be approved and hand delivered to the stockroom, so they may fill the shortage(s) and issue part(s) to the kit.


To View the Serial Number History depress the "Serial Number History" tab
 
 
Article ID: 3296