| Enter the ActSetup.exe/G.Ledger/G/L Account Setup |
 |
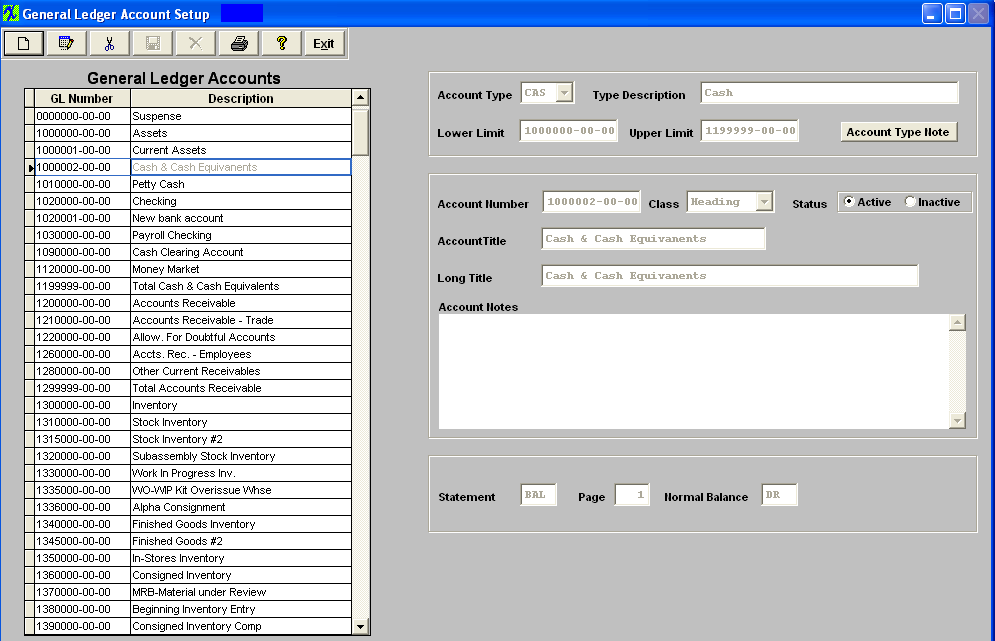
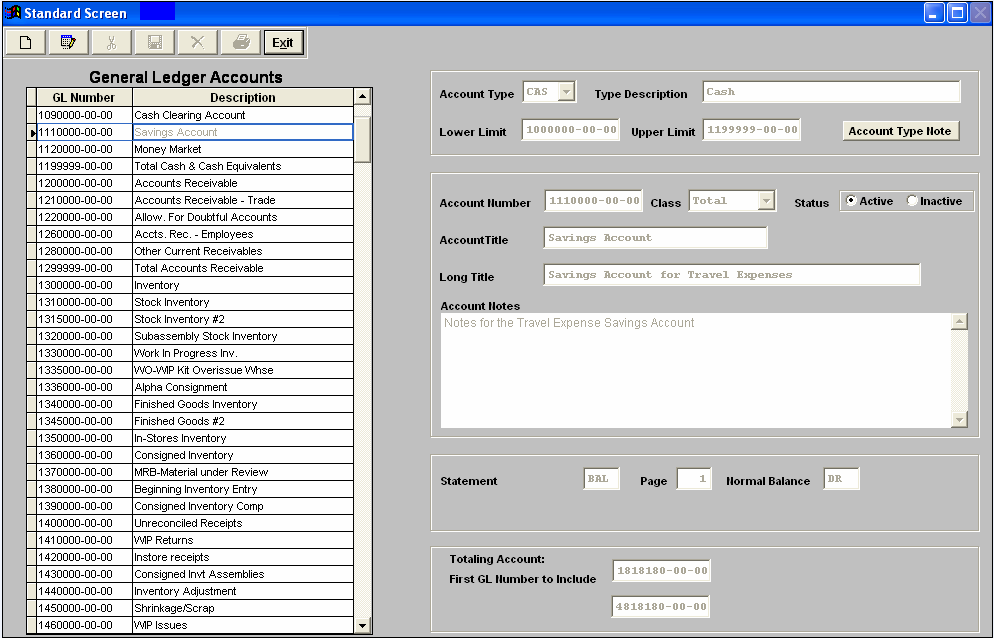
The following screen will appear:
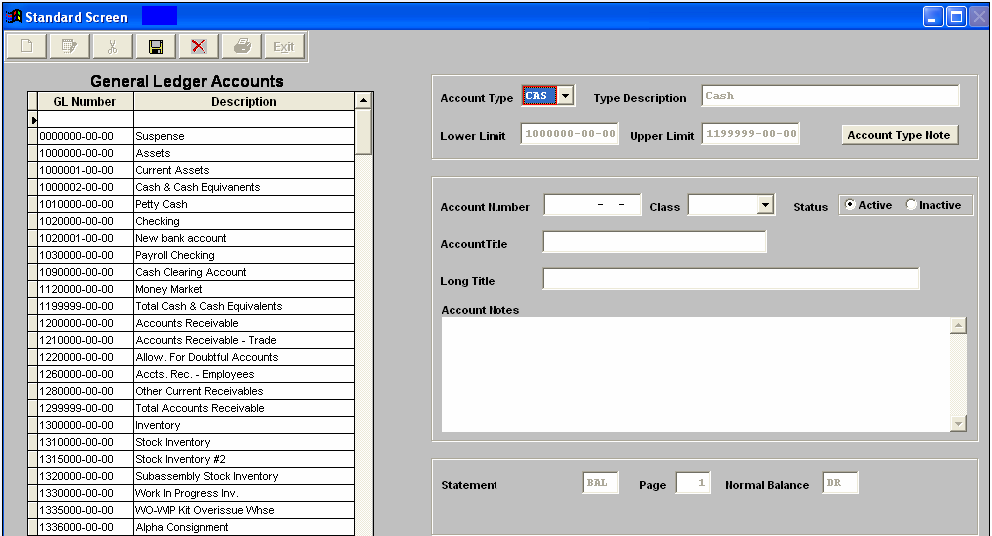
Depress the Add action button.
|
Select an Account Type for the pull down:
|
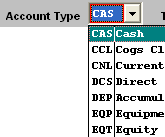 |
Once the Account Type has been selected, the Type Description, Lower Limit, Upper Limit, Statement, Page, and Normal Balance fields will default in:
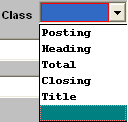
| Enter the New Account Number (must be be a number between the Lower Limit and Upper Limit). It is VERY important that the Account Number for WO-WIP Kit Overissue Whse is NOT the same as the Work in Progress Inv. Account number. (For further detail see Article #3061). Select a Class from the Pull Down.
If the account is a Total Account or a Closing Account, an additional box will appear in lower right hand of screen. User must enter in the GL number to Start and End with.
|
 |
Make sure the Status is Active.
Enter a Short Account Title and a Long Title. Enter any notes required for this account.
Depress the Save button to save changes, depress the Abandon changes button to abandon changes.
The completed entry will appear as follows:
After establishment of one or more accounts, user may Edit or Delete the account Note: A user will NOT be allowed to delete or Inactivate an account which is used in any of the setup screens in System Setup or Accounting Setup. If it is necessary to delete or inactivate such an account, 1st go into the requisite set up screen and edit the account number, then the user can come back into this screen and delete or inactivate the account. You are also NOT allowed to delete an account which has been used within the last three years. However, you can change the status to Inactive. After Adding or Editing, the user must Save or Abandon the modifications. Please remember that you can’t add a natural debit account within a range where the Normal Balance was identified as a Credit, or visa versa.
Users are allowed to change the Class of a GL number (Posting, Title, Total, etc) only if there is no activity, or if the only activity was in a period that started with a 0.00 balance, and has some activity but then ended with a 0.00 balance.
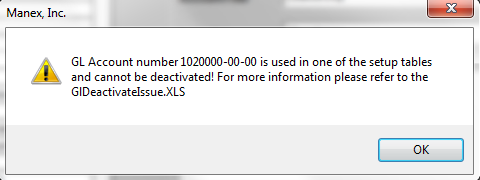
If a user tries to Inactivate an account which is used in any of the setup screens in System Setup or Accounting Setup they will receive the following message and a GlDeactivateIssue.XLS file will be created.
Steps to Delete:
Note: If you have any duplicate Titles, Headings, Totals or Closing accounts, please be sure to delete them. Otherwise, duplicate titles, etc. will appear on the reports. Delete the titles, etc. for Divs 01, 02, etc., but NOT for Div 00.
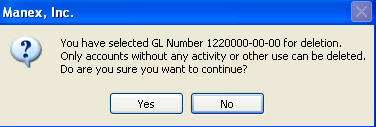
Highlight the account you want to delete. Depress the Delete button. The following confirmation message will appear:
Depress Yes to continue, depress No to abort.
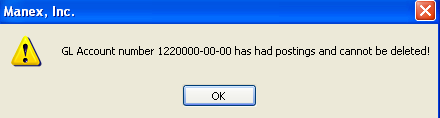
If the user depresses Yes to continue, the system will check all GLTRANS table for the existence of the account, as well as all tables used in the release and post transactions, and in any system setup default accounts (like inventotry, warehouse, etc) are using this account number. If yes, then the system will NOT allow it to be deleted from the system and users are suggested to change the description for that Account number to "Do Not Use" and change the status to Inactive.
Where Used: This Setup is required to be completed prior to establishing General Ledger numbers to inventory setups.After completing this section: «Mark as Completed in RoadMap in Section C Item 2-d»
|