Editing Manual AP Entries : If the Manual AP Entry Status is Editable and has NOT been released/posted to the GL, the user will have the ability to Edit the Invoice from the Manual AP Entry screen. All Editing for Purchase Order Invoices already transferred to the Accounts Payable Aging module MUST be edited in the Manual Invoicing module.
|
Enter the Accounting/Accounts Payable/Manual AP Entries
|
 |
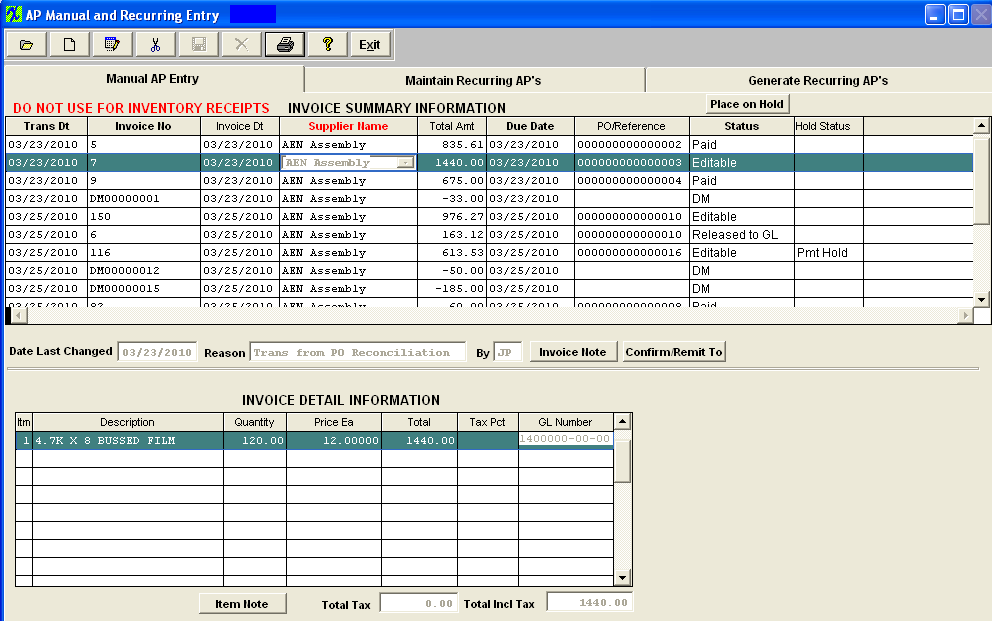
The Following Screen will appear:
Manual AP Entry using the Find Procedures

Depress the Edit button and type in your password. Make the desired changes. Type in the Reason for the change. If you change any of the amounts, make sure that the "Total Amt" field and the "Total Incl Tax" fields are equal.
Note: If you change the total detail pricing, you must also change the total amount column at the top of the screen, otherwise the Save button will not be available.
The user may add notes to both the Invoice Notes and the Item Notes. Depress the Edit button. Depress the Note button. Depress the Edit button. Type in the note.Depress the Save button. Depress the Exit button. The note button will light up in red.
The user may also change information in the Confirm/Remit To screen. Depress the Edit button. Depress the Confirm/Remit To button. The following screen will appear:
The user may change the TERMS by depressing the down arrow next to the Terms field and selecting a new term.
The user may also change the CONFIRM TO address or the REMIT TO address by depressing the arrows next to those fields and selecting a new address. Once the edited changes are complete, depress the Save button.
For future Finds, the most recent edited change reason will display. If there was more than one edited change, depress the Invoice Note button to see all of the changes.
|