Issuing or Expensing Inventory Items with no Work Order
The following types of items would be covered in the Issue screen:
1. Issuing to Cost of Goods Sold (Usually Non-taxable)
Such as: Tems with no Bills of Material; Prototypes and Pilot Products for Resale; Items not classified as “Used in Kit”
2. Expensing for In-House Consumption (Usually Taxable)
Such as: Items consumed in the production process but not shipped as a part of product for resale; Items used for calibration or testing of the production process; Items used for samples or prototypes which are not resold.
3. Return In-store 2 Vendor
If the user has in-store items, which they want to return to the Vendor without any impact on accounting or PO (like obsolete parts) there is a check box available within the issue page "Return In-store 2 Vendor". (This field will only be visible if the In-store warehouse is selected). If check-marked no purchase order will be created and there will also be no impact on the Gl values.
NOTE: Any Return to Vendor will NOT be counted as inventory used in the EAU calculation.
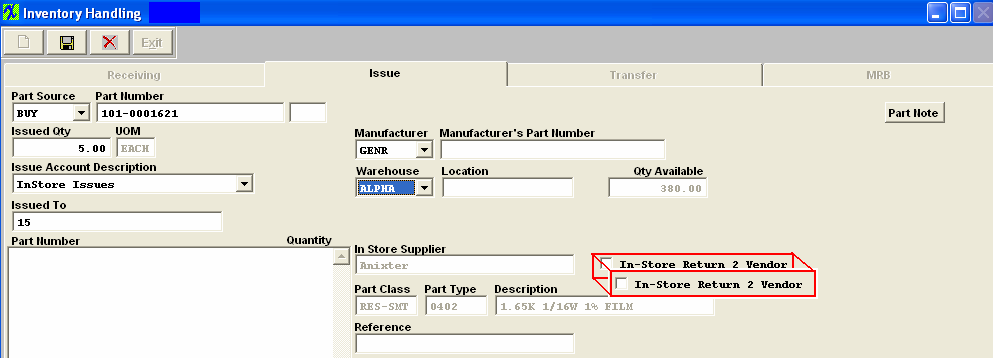
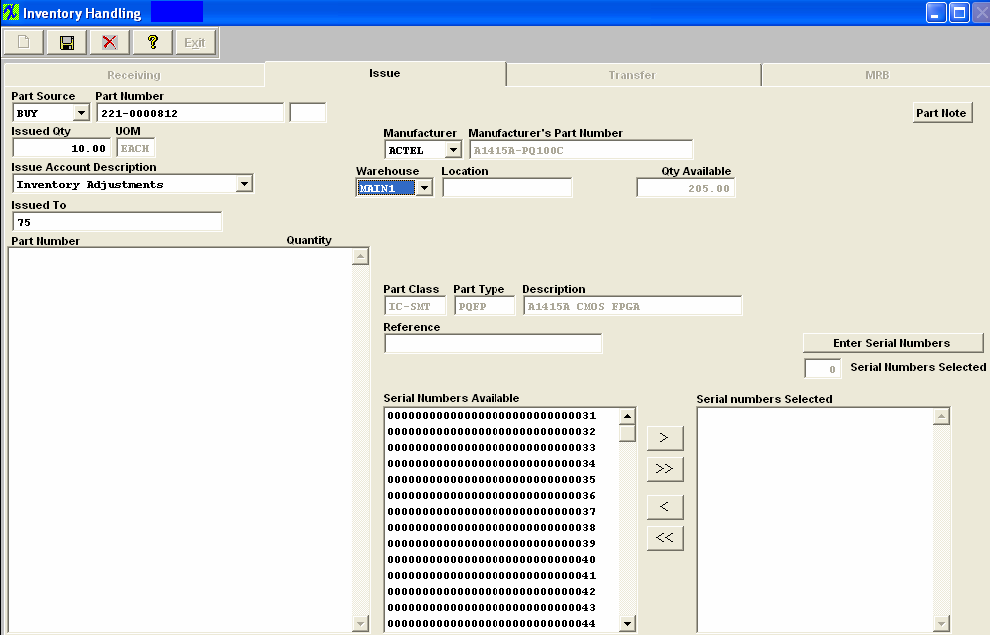
To access this screen, depress the Issue tab and the following screen will appear:
To issue inventory items follow these steps.
- Depress the Add button.
- Type in your password.
- Select the Part Source from the pull down menu. (BUY, MAKE, CONSG, or PHANTOM).
- Type in the Part Number, if Part Source is "CONSG" you will need to enter Customer Name from pull down, then you will have a choice to enter in customer PN or Internal PN.
- Part type, class, and description will default in.
- Type in the Issued quantity.
- Select the Issue Account Description from the pull down menu.
- Type in Issued To.
- Select the Manufacturer & manufacturer part number from the pull down list.
- The warehouse will default in. If the default is not the warehouse you want you may choose from the pull down list.
- Type in the Reference.
- Depress the Save button.
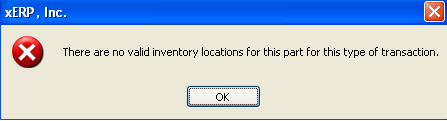 |
This message is a general message user gets when the program can not find any warehouse/location for this part number. This message will appear if the part is locked in cycle count or physical inventory. User must reconcile and post the physical inventory for this part and then you will be able to process the records within Inventory Handling.
|
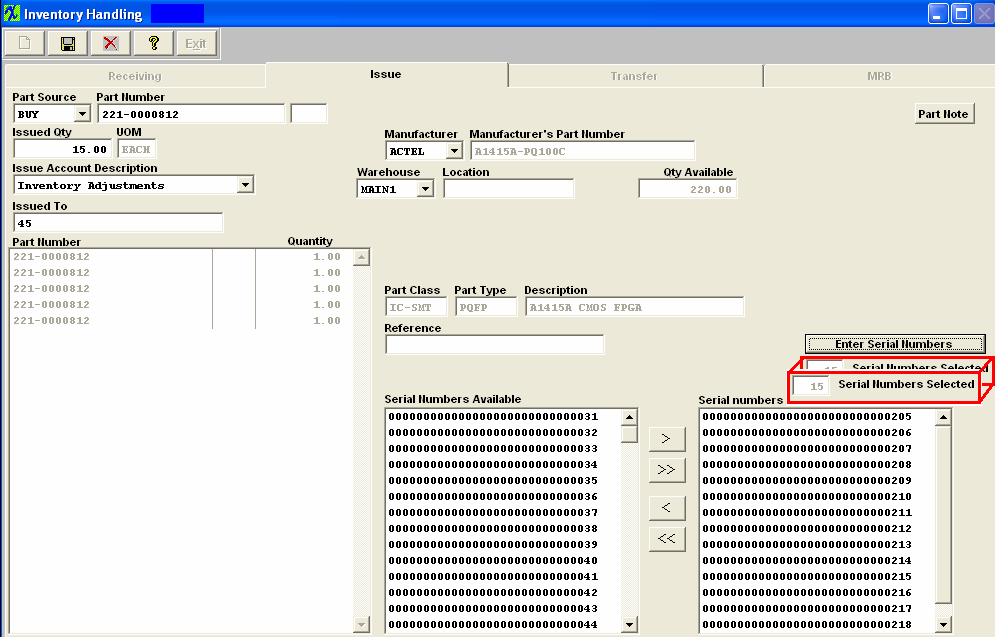
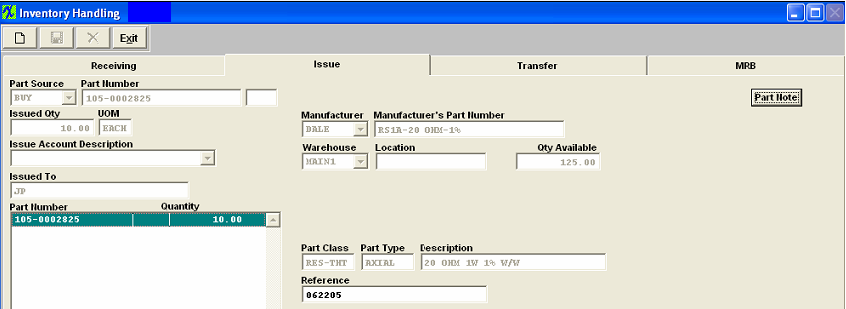
The completed screen will look like this.
If issuing parts with Serial Numbers once user has entered the Part number info, etc.
Users have the option of selecting the Serial Numbers to be issued two different ways:
1. By highlighting and using the arrows or
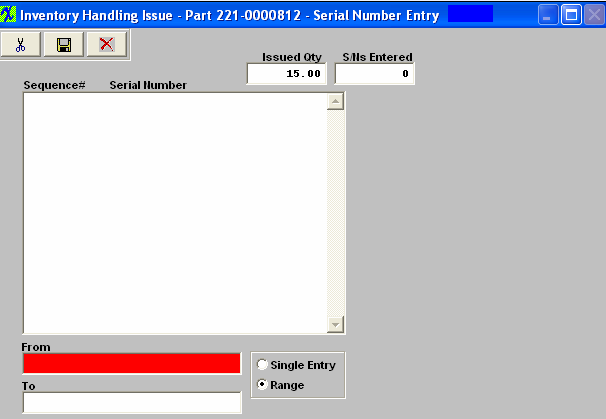
2. Depressing the Enter Serial Numbers button and the following screen will appear:
Select the proper radial "Single Entry" or "Range" and enter in the From and To SN's:
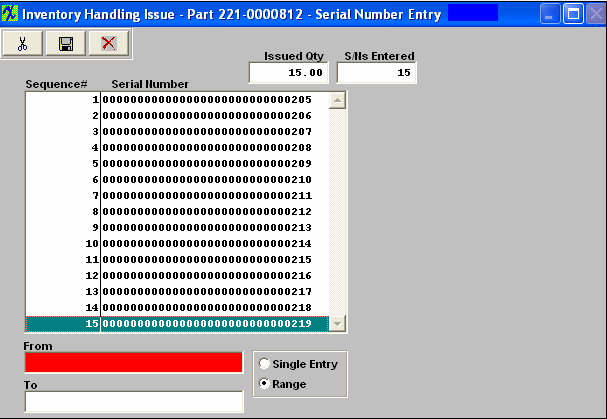
Depress the Save button and the SN's will transfer over into the Inventory Handling issue screen. The number of Serial numbers selected will be displayed, as shown below:
Depress the Save button to save changes, or the Abandon changes button the abandon changes.
|