|
Depress Inventory Mgmt/Inventory Control Management/Inventory Handling
|
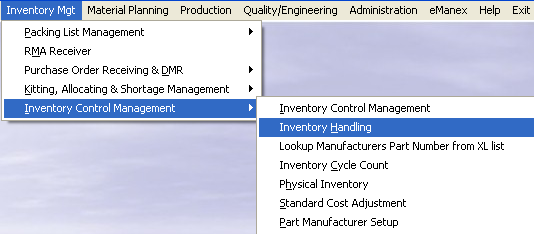 |
The main screen will appear
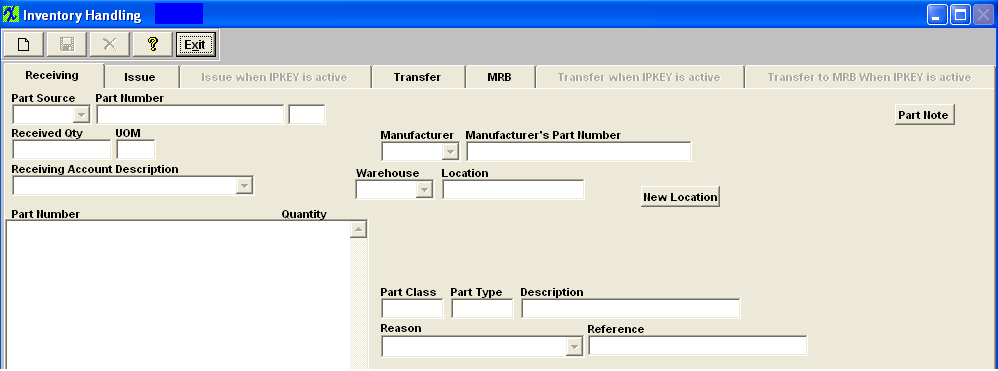
Inventory Handling is used for receipt of non-purchase order receipts.
To add inventory, depress the Receiving tab.
- Depress the Add button.
- Type in your password.
- Select the Part Source from the pull down menu (BUY, MAKE, CONSG, or PHANTOM).
- Type in the Part Number, if Part Source is "CONSG" you will need to enter Customer Name from pull down, then you will have a choice to enter in customer PN or Internal PN.
- Part type, class, and description will default in.
- Type in the Received quantity.
- Select the Receiving Account Description from the pull down menu.
- Select the Manufacturer & manufacturer part number from the pull down list.
- The warehouse will default in. If the default is not the warehouse you want you may choose from the pull down list.
Select the reason for the receipt from the pull down list.
- Type in the Reference.
- Depress the Save button.
 |
This message is a general message user gets when the program can not find any warehouse/location for this part number. This message will appear if the part is locked in cycle count or physical inventory. User must reconcile and post the physical inventory for this part and then you will be able to process the records within Inventory Handling.
|
The completed screen will look like this for a Buy, Make or Phantom part.
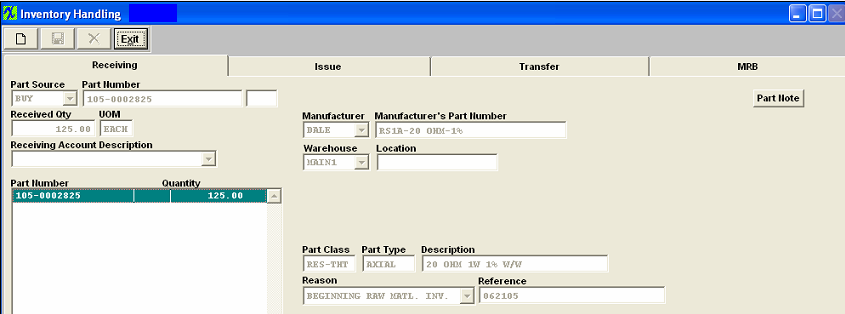
The completed screen will look like this for a Consigned part. 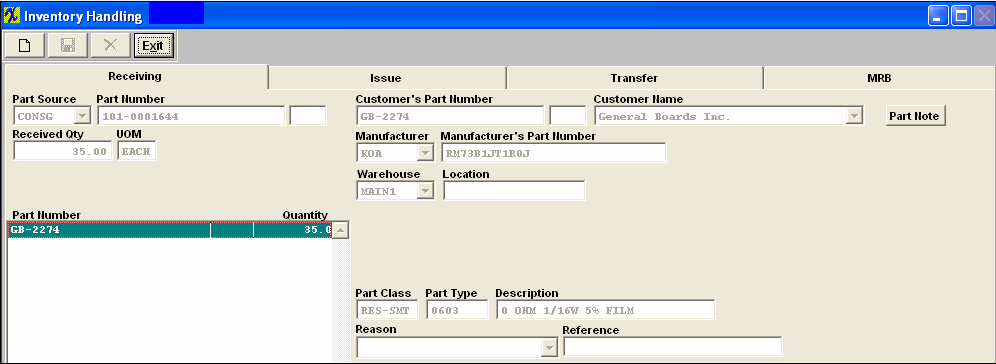
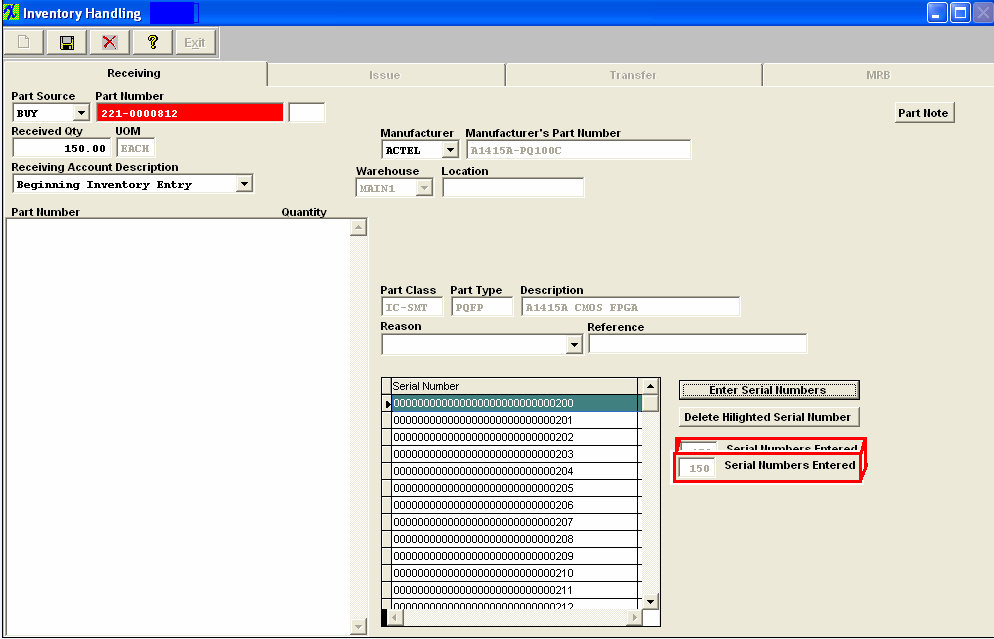
The completed screen will look like this for a Serialized part. Note: Users are allowed to receive in once issued out SN(s) back into stock, if the SN is for the same part number, and was issued out through inventory handling, then the system will re-link it to its old history. If the SN has been shipped out of the system via a packing list, the following message will be displayed

and the user will be required to receive it back in through the RMA Process.
The completed screen will look like this for a Lot Coded part.
If the "Allow Auto Creating Location at Receiving" box has been selected for a specific AVL in the ICM module the "New Location" button will appear on the Receiving screen as shown below.
Depress the New Location button and the following screen will appear, giving the user the option to create a new Warehouse/Location for this part:
Depress "Yes" and the following screen will appear, listing the Warehouse(s) that have the "Allow to Auto Create Location at Receiving" box selected in the Warehouse Setup module.
If user selects InStore a Supplier selection will appear in the screen:
When all the information has been entered the New Warehouse/Location will appear in the Quantity Info screen with the ICM module.
|