ArticlesArticles Most Helpful ArticlesMost Helpful Articles Language SettingsLanguage Settings LoginLogin
RSS Feeds
DrillDown Icon Table of Contents Back
 . . . . . . . . . . . . .
DrillDown Icon System Administrator
DrillDown Icon Security System
DrillDown Icon Trigger Setup
DrillDown Icon System Setup
DrillDown Icon General Setup
DrillDown Icon General Setup Introduction
DrillDown Icon Number System
DrillDown Icon Adminstrative and Production Calendar
DrillDown Icon Administrative Departments
DrillDown Icon Designate a PDF directory
DrillDown Icon Payment Terms
DrillDown Icon Prerequisites
DrillDown Icon Introduction
DrillDown Icon Fields & Definitions
DrillDown Icon How To .....
DrillDown Icon Setup Payment Terms
DrillDown Icon Sales Tax Authority Table
DrillDown Icon Standard Foot Notes
DrillDown Icon User Defined Reports Setup
DrillDown Icon System Appearance
DrillDown Icon Wireless Interface to ManEx Development
DrillDown Icon Sales
DrillDown Icon Production
DrillDown Icon Material
DrillDown Icon FAQs
DrillDown Icon Quick Start
DrillDown Icon Operations Manuals
DrillDown Icon Accounting Manuals
DrillDown Icon System Utilities
DrillDown Icon Definitions
  Email This ArticlePrint PreviewPrint Current Article and All Sub-Articles
 
Setup Payment Terms

 Enter System Setup/General Setup/Payment Terms  

The following screen will appear:

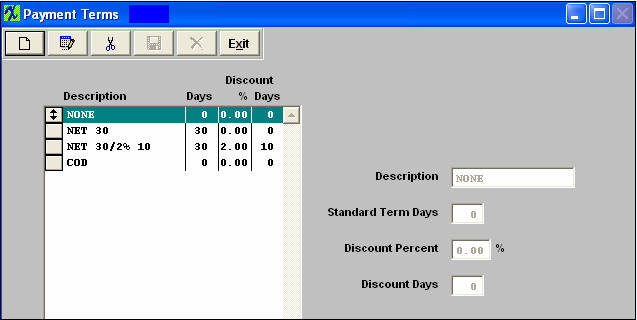
To modify this screen, the user must click on the Add, Edit, or Delete button and supply the password. That action will enable the screen.

Pressing the Add button will enable the data entry boxes at the left of the screen for the user to enter new data.

Selecting an existing Payment Term and pressing the Edit button will bring the selected information to the data entry box to be modified.

Selecting an existing Payment Term and pressing the Delete button will remove the selected information.

The user enters in the Description, standard days, discount (as a percent) and discount days.

The user must Save or Abandon Changes after adding or editing data.

These items may be rearranged in any order by clicking on and dragging the box to the left side to the (vertical) position desired. This order will be the order the user sees when using this list in other modules within the system. Suggestion: Have the one most used at the top of the list.

Where Used:  In the Customer Setup, Sales Orders, Packing Lists,

Invoicing, Supplier Setup, and Accounting.


«Mark as Completed in RoadMap Section B Item 1-e»

Article ID: 1285