| To enter the Bill of Material Module depress Quality/Engineering/Integrated BOM & AVL |
 |
When the screen first opens, the user is limited to only three of the eleven action buttons shown: Find an assembly, run a Report or Exit. After finding an assembly, the user may page ahead or back through all Make items using the > right arrow or < left arrow button. Assemblies having Bills of Material will display the components in the Body (Detail Window) below. Selection of one of the components in the window will cause detail information for that item to be displayed if any other BOM screen Tab is selected. Use the Add icon to add components to the BOM of a displayed assembly. Use Edit to change or add Header information. Use the Delete icon to Delete the entire BOM ONLY (See Deletions section). Note: Go to the Item Detail screen to delete only one item from the BOM.

Find a Bill of Material
To view an existing BOM or to find an existing Make Source Item (Product, Assembly, Subassembly or Phantom) under which to build a BOM.
Click on the Find an existing record Action Button.
|
Find an existing BOM screen selection will display:
Select the desired search radials by clicking on them. Choose between Active, Inactive or All for the status, (Note: The status of the BOM may be different than the status of the Inventory Part). Since you are doing a find for the BOM you would search by the status of the BOM.
Check the "Display Customer Part #..." box to display the Customer Part number for the "Buy" parts if the BOM is linked to a customer. Selecting this option may slow down the results. The system will retain the last choice the user makes for this check box until the module has been exited.
|
 |
Find an Existing BOM by Product Number
|
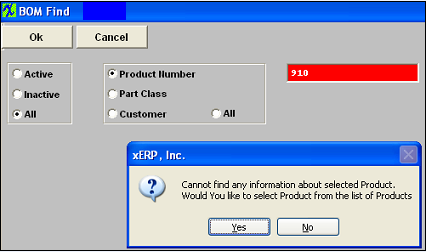
If you know the product number, click on the Search by product number radial and then type the part number into the red box and depress the OK button.
If the part number entered cannot be found you will receive a message (shown in the screen) asking you if you would like to select Product from the list of Products.
|
 |
|
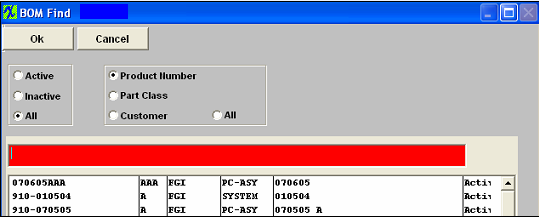
Depress "YES" and a List of Products will be displayed in the bottom section of the screen.
The parts are listed in alphanumeric order, with the Revision, Product ID, Class and Type.
Note: The status listed on the right of the screen is displaying the status of the Inventory Part not the status of the BOM, which may be different.
The user selects the Part Number by either entering it into the red box, or scrolling down the list and clicking on the selected part.
|
 |
Find a BOM by Part Class
|
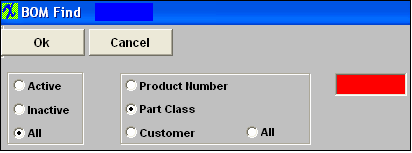
If you know the Part Class, click on the Search by part class radial and then type the part class into the red box and depress the OK button.
|
 |
|
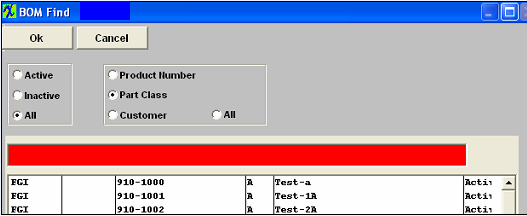
When the user is searching for an assembly through the part class option, a screen appears listing all of the products within that class in alphanumeric order.
Note: The status listed on the right of the screen is displaying the status of the Inventory Part not the status of the BOM, which may be different.
The user selects the Part Number by either entering it into the red box, or scrolling down the list and clicking on the selected part.
|
 |
Find a BOM by Customer
|
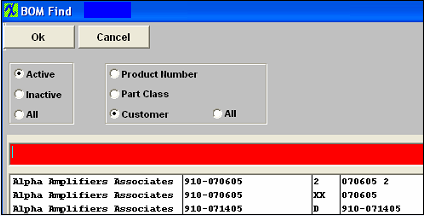
If you know the Customer, click on the Search by Customer radial and then type the Customer into the red box and depress the OK button.
|
 |
|
When the user is searching for an assembly through the Customer option, a screen appears listing all of the product numbers assigned to that customer in alphanumeric order.
Note: The status listed on the right of the screen is displaying the status of the Inventory Part not the status of the BOM, which may be different.
The parts are listed in alphanumeric order, with the Revision, Class and Type. The user selects the Part Number by either entering it into the red box, or scrolling down the list and clicking on the selected part.
|
 |
BOM Search Results
After finding the Part Number through either the Class Code, Customer, or directly by the Part Number, the BOM Main screen appears, populated with any parts already entered for the BOM of the assembly selected. If no parts have been added to the assembly, the Body (Detail Window) is blank. When BOM is found and displayed the order will be by "Item #". User can re-sort list by clicking on a header that is in Bold that header will display in red. The lines that are inactive will be highlighted in purple. When double clicking on an item, system will take you to the detail page.
User may find a part using the Reference Designator Lookup, by typing a reference designator into the text box it will auto fill the information, when done entering you can press “Enter” or click on the search button next to it and the record pointer in the grid will advance to the part if found.

The Header Information fields across the upper half of the screen are populated from the item master and from keyed-in assembly data. The fields in the Body (Detail Window) show information about the components included in the assembly.
|