|
NAVIGATION OVERVIEW
For all MANEX operations, the user starts with the shortcuts:
To access, the user clicks on the appropriate icon.
 |
This Icon will open the menu for the Accounting Setup.

|
 |
This Icon will open the screen to view or print the Error Log.
|
 |
This icon will open the LogOut screen.
|
 |
This Icon will open the menu for the ManEx Operations and Accounting

|
 |
This Icon will open the Security screen.

|
 |
This Icon will open the menu for the Setup of ManEx.

|
 |
This Icon will display the menu for the Utilities.

|
 |
This Icon will display the menu for Triggers.

|
|
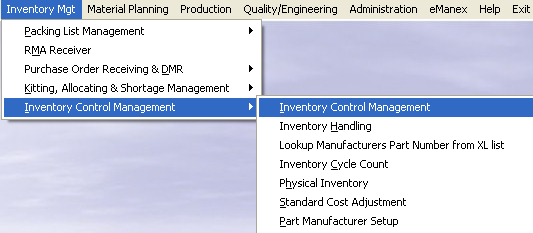
Many of the Main Menus have sub-menus. For example:
|
 |
| And those sub-menus marked with the arrow have sub-menus. For example: |
 |
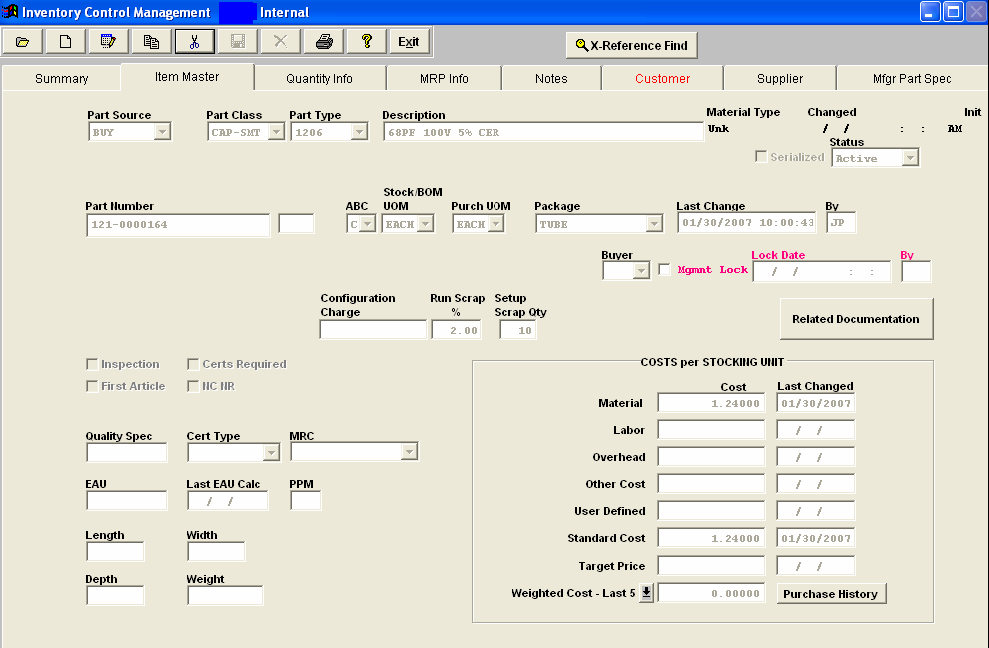
Selecting Inventory Control Management, for example, will bring up the Inventory Control screen:

Most MANEX screens have four sections: The Action buttons, Information Tabs, the Body, and Directive buttons.
Action Buttons

These are the Action buttons that you will find in ManEx. Each button is a “smart” icon and will display its function if you place your cursor above it. Simple descriptions are shown below for each icon. Not all buttons will be available at one time. For example, the SAVE button is active only after initiating an ADD or EDIT action.
Information Tabs
The Information tabs will be different in each module. For example, in the Inventory Control Management module, the tabs appear like this:

Pressing on each of these tabs brings up another screen, displaying the pertinent information relating to the tab pressed.
The Body
The Body of the screen is the area where information is displayed, entered or edited. For example, the Item Master tab displays the following:

Copy and Paste Functions
|
ManEx has a Copy and Paste function in the larger free-form fields like the Notes and Profile fields.
Copy and Paste instructions are the same as most Windows applications: You must be in a field that is active for Copy and Paste. ManEx must be in Edit or Data Entry mode for Copy and Paste to be active.
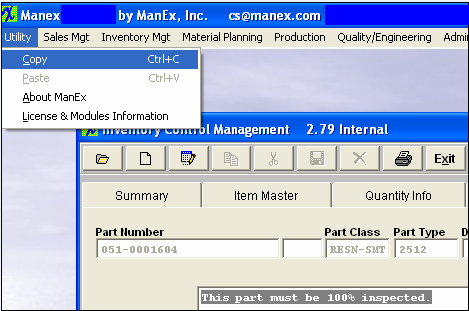
The cursor must be active in an editable text field. Tab or mouse click to go there. Highlight what you want to copy, as illustrated.
Click on the MANEX Utility pull down menu, as illustrated. If the Copy option is lit, then the user may copy the wording highlighted.
To paste, go to the destination and place the cursor at the place you want to paste and left mouse click.
|
 |
|