To create a part number in ManEx, simply follow the easy steps outlined below:
|
This tutorial will explain how to create a top level part number in ManEx. To add components to the system you can follow these steps, but alter Step 4 by setting the Part Source to "Buy" or "CONSG" and selecting a different part class and type.
Click HERE for a video demonstration
|
| Step 1 |
|
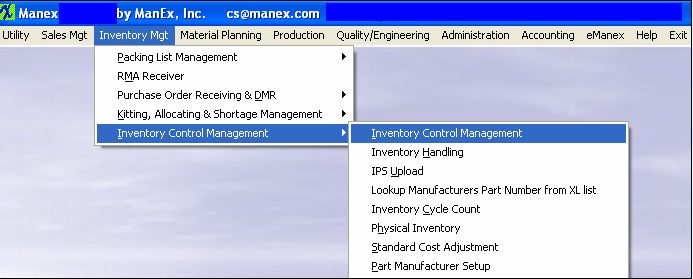
Select Inventory Mgt / Inventory Control Management / Inventory Control Management

|
|
| Step 2 |
Click "Add"  |
|
| Step 3 |
| Enter your password (enter "one1" if you have not setup security controls). |
|
| Step 4 |
|
Select the Part Source, Part Class, and Part Type. (For this tutorial select "Make", "FGI", and "PC-ASY")

|
|
| Step 5 |
|
Enter the part information (For this tutorial only the Description and part number suffix are required).

|
|
|
Step 6
|
|
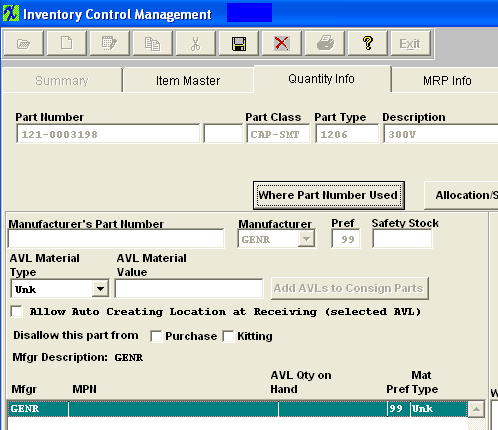
Click the "Quantitiy Info" tab and click save. (This creates the first AVL for the part in ManEx. You can add more manufacturers and part numbers if desired).

|
|
| Step 7 |
|
Click "Save" 
|
|
Congratulations, you have now created a part in ManEx!
ManEx also has the ability to track MRP information, set-up and run scrap, mfg drawings and much more! We strongly recommend that you get in-depth training on the features, uses, and benefits of inventory control management in ManEx.
For more information, please refer to the Inventory Control Management article.
|